Don't Chase Variability with CAM
A recent study showed that mechanical SuperTuning of a moderately priced CNC machine could dramatically improve volumetric positioning accuracy.
In order to implement the most cost-effective solutions to customers’ production requirements, shopfloor managers often call upon the least expensive machine on the floor that can handle the job right. Of course “right” involves more than just accuracy. Along with machine availability, there are often trade-offs concerning speeds that must be considered.
A study performed by Independent Quality Labs (IQL, Rockville, R.I.) shows that the volumetric positioning accuracy of a popular, moderately priced machine tool can be improved by a factor of 2 to 1 versus the same machine that was purchased and installed to the manufacturer’s standard specifications. This makes it unnecessary to use CAM software to compensate for dimensional variability within the machine’s measuring envelope.
Featured Content
IQL Vice President Michael Mariani offered several reasons why chasing part variability with CAM software can be a bad idea. “Over time by trial and error the good machinist will often arrive at a magic combination of offsets that will allow all features on all the parts in the setup to be manufactured within the spec,” he explains. “Sometimes this strategy works in the short run, only to have out-of-spec dimensions reappear a day or two later. Sometimes parts close to the center of the machine come out fine but others farther away from the volumetric center of the work envelope vary in and out of spec.
“All the time spent tweaking and re-tweaking the CAM program is a hidden cost, typically absorbed into general shop overhead where it cannot be accurately accounted for,” Mr. Mariani continues. “In addition, the out-of-spec parts created during the tweaking process lead to costly scrap and rework. Using CAM in this fashion to create a program with machine-specific offsets also means that the program cannot be used on another CNC machine without considerable readjustment, and this inhibits the shop’s work scheduling flexibility.”
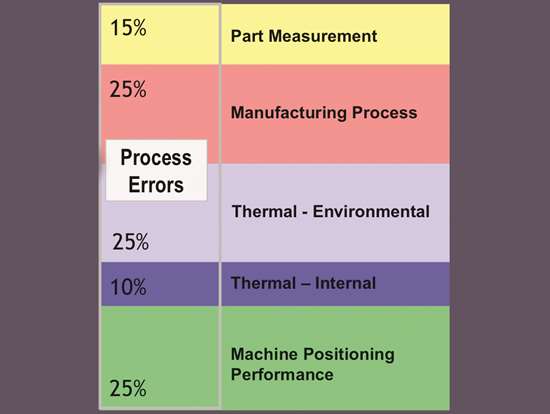
One alternative to chasing part variation with CAM is to replace equipment having marginal positioning accuracy for the work at hand with high precision CNC systems. Sometimes this is the best choice. Another solution is to characterize and fine-tune existing CNC machines to ensure they have volumetric positioning performance adequate for producing on-spec part features anywhere within the equipment’s work envelope. When a machine’s positioning uncertainty is less than 25 percent of the part’s most critical tolerances, it will be up to the task in most cases.
In the study, IQL measured test pieces manufactured on a moderately priced VMC before and after the equipment was “SuperTuned.” SuperTuning is IQL’s proprietary methodology that involves using instruments traceable to the National Institute of Standards and Technology (NIST) to characterize and adjust errors that impact a CNC machine’s positioning accuracy. This on-site process combines low-impact anchoring and precision alignment/adjustment resulting in high machine stability and optimum positioning performance. New and existing machines can be SuperTuned, and the process can be executed in a few days, minimizing production impact.
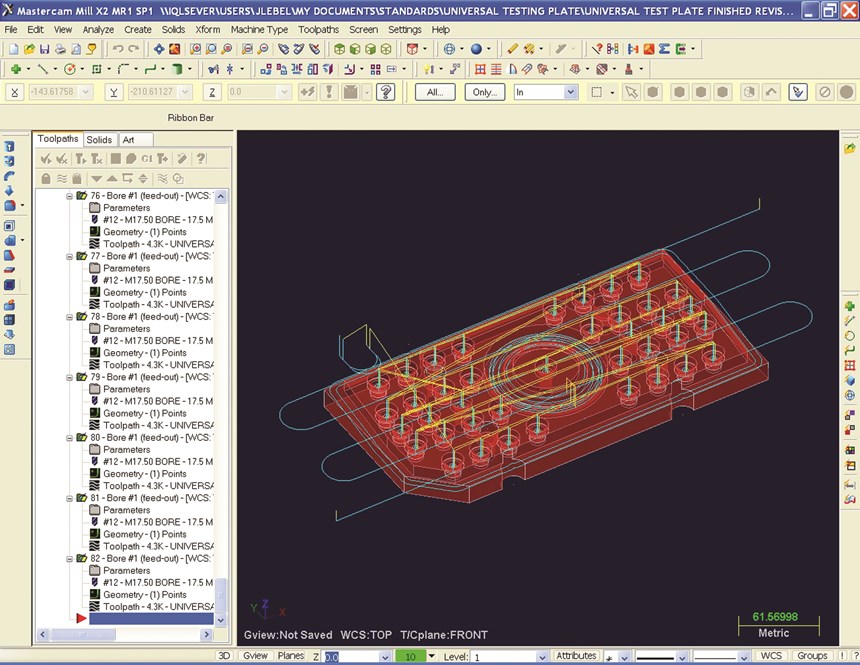
The ASME B5.54 test part was created as a solid model in SolidWorks and imported into Mastercam CAD/CAM software for efficient toolpath generation. These were chosen because they are widely used by CNC manufacturing shops around the world.
Mastercam is a Windows-based CAD/CAM package developed by CNC Software Inc. (Tolland, Conn.). It can be used for two- through five-axis milling and turning; two- and four-axis wire EDM; 2D and 3D design, surface and solid modeling; artistic relief cutting; and 2D and 3D routing.
The CAM-generated part program created a test piece that consisted of 36 sets of bores and counterbores. Half of these were manufactured with the tool approaching the part in one direction and half with the tool approaching from the opposite direction. This technique made it possible to observe the effects of reversal errors because of axis backlash.
The before and after parts were taken to the Hexagon Metrology Precision Center in North Kingstown, R.I., and measured with PC-DMIS measurement software on a Leitz PMM Infinity ultraprecision CMM with a measuring accuracy of less than a micron. The measurements showed that SuperTuning not only improved positioning accuracy of the VMC by a factor of two, but it also dramatically minimized the disparity of positioning accuracy for parts manufactured in different locations (positions one and two) within the machine’s working envelope.
Mr. Mariani concludes, “What this means is that, with proper tuning, a $100,000 machine tool can produce positioning results comparable to high precision equipment costing two or three times more. The manufacturer won’t have to use its CAM system to chase after variations from spec. Instead, the advanced toolpath generating capabilities of the CAM program can be used for what they were intended—creating geometries that most closely represent design intent while optimizing equipment productivity.”
RELATED CONTENT
-
Winning New Jobs With Online Bidding
The digital revolution is hitting the business of the multiple-spindle automatic machining--in two distinct forms, no less. Twenty-five years after the first wave of digitization in manufacturing (numerical control) its linear descendant, computer numerical control or CNC, is changing the way screw machine shops do business.
-
Keeping Watch on Small Parts
From watch parts to exotic medical applications, this shop takes on the world of micromachining.
-
Why Using Pirated Software is Riskier Than Ever
Machine shops and manufacturers that use pirated software risk losing much more – both directly and indirectly.


