Groove Milling Cuts Down Cycle Time for Inconel Part
When a shop tries to outsource a part, but no vendors want to take on the job, it’s time for that shop to figure out how to machine the job on its own.
#basics
Edited by Lori Beckman
When a shop tries to outsource a part, but no vendors want to take on the job, it’s time for that shop to figure out how to machine the job on its own. That’s what Cambron Engineering (Bay City, Michigan) had to do with a job. Cycle time reduction for a particularly vexing feature on the Inconel parts became a priority. A chance encounter with Horn Application Engineer Brett Kischnick brought about a new tooling approach that cut cycle time from 59 seconds to 10 seconds for the feature, taking out 19 hours of the part’s 80 hours total machining time.
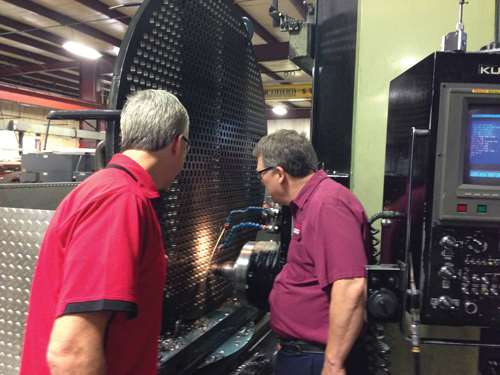
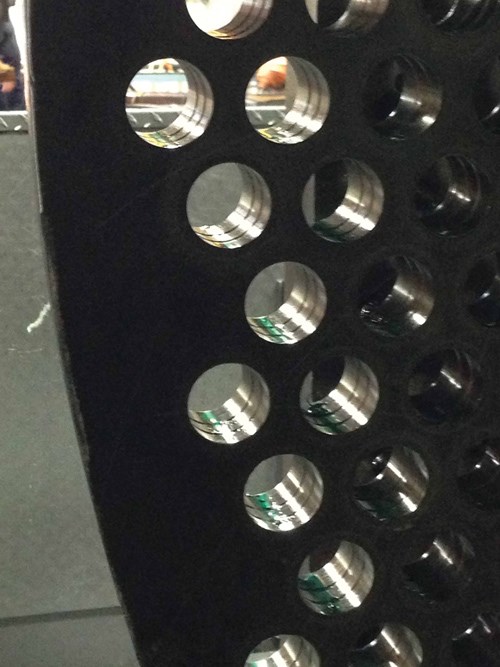
The two parts are Inconel 600 (nickel, chromium, iron) plate, about 8 feet in diameter and 1.875 inches thick, to be used as tube sheets in a shell-and-tube heat exchanger, an ideal application for this strong, heat/corrosion resistant material. Each disc must be drilled through, with 1,400 1.5-inch-diameter holes, each with two 0.126-inch (wide) by 0.015-inch (deep) grooves milled into the circumference of each bore. It’s a touchy and tough piece with the material alone worth about $60,000, according to Cambron Tool Engineer Bryon Christilaw, but it’s well within Cambron’s capability.
Featured Content
Cambron machines these parts on a 25-hp Kuraki boring mill, and the interpolated grooving cuts were particularly difficult. “We were using a three-flute, 0.125-inch-wide groove milling insert that was 0.697-inch in diameter,” Mr. Christilaw says. Running at 750 rpm and 9-ipm feed rate with 0.004-inch per tooth engagement, each groove took about 30 seconds—consuming 19 hours of the part’s 80-hour machining time. “This didn’t include the operator’s time for in-process measurements, cutter compensation and insert changes,” he says.
The company is a go-to supplier for nine GM plants, offering a climate-controlled, 33,000-square-foot shop and 47-person staff capable of design and manufacture of gages, dies, tooling, fixtures and special machinery, as well as CNC machining of large fabrications.
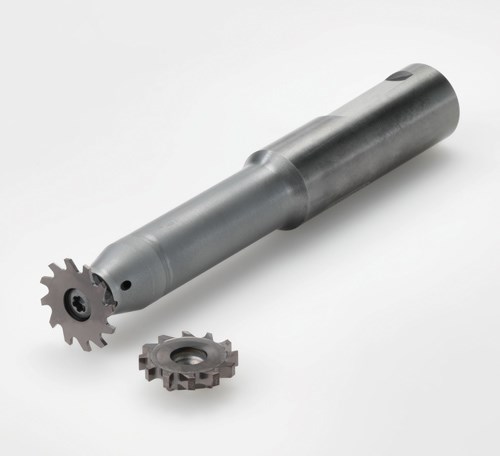
A part this size and configuration naturally attracts attention when fixtured up, so Horn Application Engineer Brett Kischnick—visiting the shop to handle questions about lathe grooving—asked the operator about it and learned about the tool life and cycle time issues. He later proposed a solution with a Horn 713 12-flute groove milling insert, 0.854-inch in diameter and 0.118-inch wide. The small differences prove what a “game of inches” machining can be, because the new insert reduced cycle time for each groove is from 30 seconds to 5 seconds.
The larger tool diameter—only 0.157-inch larger—reduces the length per cut from 1.830 inches to 1.337 inches, which is about 27 percent. Increasing the number of cutter teeth from three to 12 allows a 400-percent increase in feed rate from 9 ipm to 36 ipm, while maintaining the same 0.004 inch per tooth engagement.
In addition, the smaller width of the 12-tooth tool (0.118 inch versus 0.125 inch) leaves 0.008-inch material for the second pass on each groove. This produces a larger chip to minimize heat buildup in the tool, which is amplified when trying to “rub off” 0.001 inch.
“It is important to have enough stock to produce a good chip to carry the heat away,” Mr. Kischnick explains. “Otherwise, the tool will absorb more cutting heat. The cooler the tool, the longer it stays sharp.” In fact, the 12-tooth tool lasts almost three times as long as the three-tooth tool: 45 minutes versus 18 minutes.
The 713 12-tooth milling cutters produce a smooth cut. They are designed for grooves as much as 0.185-inch deep and 0.039-inch to 0.118-inch wide in holes as small as 0.886-inch diameter. They are screwed to the front face of a standard carbide shank and utilize straight or staggered cutting edges, depending on the width.
“These tiny grooves had always taken a big chunk of the total cycle time, but this new tool cuts that down to a proportion that’s more in line with their size,” Mr. Christilaw says. “Anytime you can cut 25 percent off the cycle time for a part by simply going to a different style tool, it’s a real game changer.”
RELATED CONTENT
-
5 Process Security Tips for Parting Off
Here are five rules of thumb from Scott Lewis, a product and application specialist at Sandvik Coromant, to optimize the parting off process, and as a result, maximize tool and insert life.
-
Cutting Tool Coating Production
This article looks at the coating methods available for carbide cutting tools.
-
Making Micro Threads
Production of micro threads can be challenging, but using the most suitable tools for a given application can simplify the task.


