Machines Simplify Inspection of Multiple Parts
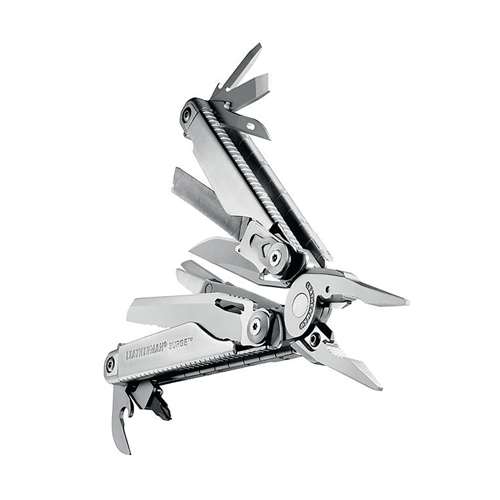
When multi-tool creator Leatherman Tool Group Inc. (Portland, Oregon) was looking for new technology to improve its measurement capabilities, company management was hoping to find a measurement system that offered easy programming and operation, efficiency, and the ability to hold tight tolerances.
Edited by Lori Beckman
When multi-tool creator Leatherman Tool Group Inc. (Portland, Oregon) was looking for new technology to improve its measurement capabilities, company management was hoping to find a measurement system that offered easy programming and operation, efficiency, and the ability to hold tight tolerances.
Keyence Corp. was one of the companies that visited Leatherman, demonstrating its IM series dimensional measurement vision system. Leatherman was impressed with the speed and simplicity of the system and went forward with the purchase. The Keyence system initially replaced the hard gaging system that Leatherman used for many years to evaluate components for its multi-tools, eliminating cabinets full of hard fixtures built for specific parts. Now the company quickly and reliably measures multiple features of a variety of parts.
Featured Content
Leatherman produces screwdrivers, knives, files and other tools in a single unit. The tools, some small enough to fit on a keychain, are known around the world by everyone from homeowners taking on a weekend project to first responders, military personnel and even medical professionals.
“We produce a lot of parts from start to finish,” says Leatherman gage technician, David Knight. “We don’t have a foundry here, so for cast parts, we receive blanks and do the machining. For most of our steel parts, we get rolls of steel, blank them and machine them, heat treat them, and then assemble them.”
Leatherman uses measuring equipment ranging from micrometers all the way up to a coordinate measuring machine (CMM) to inspect parts at various stages of the process, including sampling of incoming lots, first-article inspection and production quality assurance.
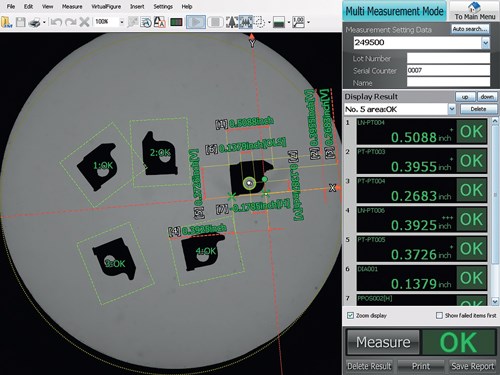
For the IM system, an operator simply places a target part on the stage and presses the “measure” button. The system then automatically measures up to 99 points in a matter of seconds with repeatability of ±1 micron. The speed, flexibility, and ease of programming and use make the IM series an ideal fit for the company’s variety of parts.
Prior to the Keyence system’s implementation, getting a fixture designed and fabricated in the company’s machine shop could take weeks, but the Keyence system enables Leatherman to get parts up and running with full inspection capability in a matter of minutes or hours. The system also easily handles Leatherman’s tolerances, which are important to proper assembly and function of its multi-tools.
“Our parts all have to fit together in one tool, so tolerances are tight, most commonly ±0.001 inch and ±0.003 inch. Hole position tolerances are especially important,” Mr. Knight says. “I do a lot of programming for the IM systems, and for simple parts, I can have a program in 10 minutes. Even for the most complex parts we inspect on the Keyence, I can have a program done and evaluated in an hour or two.”
The company now has three IM series measurement systems, and management is hoping to purchase another one in the near future, with a larger stage. “We’ve got dozens of programs on our three IM systems that measure up to 50 features on some of our more complex parts,” Mr. Knight says. “But for me, the best thing about the systems is their production inspection capability—they’re easy to use. There’s no chance of operator error. Operators just place the part on the stage and push the button. No matter who does that, they’re going to get the same results in a few seconds. It’s a big time saver, and knowing that everybody’s going to get the same measurements when they use the system provides peace of mind.”
Training Leatherman personnel to program and use the IM systems has also been fast and easy. Mr. Knight says operators can be trained in just a few minutes, enabling them to check parts themselves rather than bringing them to the quality department for evaluation. The location of Leatherman’s three IM systems near machining centers, stamping presses and other production equipment on the shop floor also facilitates first-article inspection, process control and troubleshooting.
For more information from Leatherman Too Group Inc., visit leatherman.com.
RELATED CONTENT
-
Determine Passivation of Stainless
Properly cleaned stainless steel is naturally protected from corrosion by a thin, passive film. But this passive layer can be removed or scratched. A passivation meter measures the surface potential under controlled conditions.
-
Setup Options for Swiss Automatic Lathes
A hydraulic chuck and a counter-balanced centering tool, originally developed as in-house solutions, are now available to address the limited working space that is common in Swiss machining.
-
Why a CNC Multi-Spindle Machining Center Makes Sense for MetalQuest
An early adopter of multitasking equipment, this Nebraska contract manufacturer has taken what it feels is the next logical step to diversify by adding a multi-spindle for greatly reduced cycle times on an existing high-volume job.


