Monitoring Improves Machine Up Time And Shop Efficiency
Systems for monitoring the machining process not only allow tool wear and tool breakage to be detected at an early stage, but they also provide a process assessment and optimization functions that can be used to improve machine utilization and thus improve the return on machine capital cost.
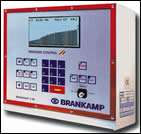
Systems for monitoring the machining process not only allow tool wear and tool breakage to be detected at an early stage, but they also provide a process assessment and optimization functions that can be used to improve machine utilization and thus improve the return on machine capital cost. Brankamp Process Automation, Inc. (Cambridge, Massachusetts) manufactures an extensive line of process monitoring equipment that watches individual machines and collects data for shopfloor analysis. An example of a specific device for precision parts manufacturers is the company’s end of bar monitor that eliminates short parts on multi-spindle machines and single and dual turret turning centers. This allows shops to keep machines running unattended or lightly tended for extended periods. But monitoring is also about looking at the shop holistically.
Present-day production engineering is, to a large extent, automated. Complex manufacturing systems mean that individual units are highly interdependent. Faults and breakdowns mean stoppage of a group of machines, thus reducing overall capacity utilization. The strategic objective of an unattended third shift, allowing the machines to continue working as long as the stock of material and technical conditions of the machine are satisfactory, has already become operational reality. For this it is essential to provide electronic systems to monitor the production process, since the human operator to watch over the process is no longer present.
Featured Content
Formerly, monitoring efforts concentrated on the tool itself as being the major source of faults in machining. Every machining tool wears, and every tool will break if it is overloaded above certain physical limits. Studies performed in industry have shown that the main causes of downtime are end of tool life (wear) and tool breakage. Together these account for 40-45 percent of downtime in turning, drilling, and milling operations. The machine itself is, for instance, only the reason for stoppage in 3 percent of cases.
To achieve better utilization of capital-intensive production equipment it is essential to have monitoring systems to detect faults arising in the metal-cutting process and initiate countermeasures. The systems allow productive time to be extended into periods where little or no staffing is present.
Only 8 percent of available production time is actually used as main metal-cutting time. Part of the unused potential here can be captured by process monitoring systems. Increasing machine cutting efficiency increases capacity and means that installing a relatively inexpensive process monitoring unit can eliminate the need to purchase an expensive new machine tool.
Cutting Force As A Source Of Information
To prevent damage to the tool, toolholder and machine it is necessary to have a means of reliably and quickly detecting an actual or imminent tool breakage. This can only be achieved by making in-process measurements. Continuous monitoring of the metal-cutting process is needed to detect any abnormalities. The cutting forces, or even certain components of cutting forces, are a particularly suitable parameter, since they directly mirror the condition of the process.
A suitable set of sensors and a suitable monitoring strategy programmed in the monitoring system must be capable of detecting instantaneously what is happening at the moment of tool breakage, and of stopping the feed motion so rapidly that consequential damage to the machine, the toolholder or the workpiece are prevented. Fortunately the measurable parameter “cutting force” contains information not only on the condition of the tool but also on other factors influencing the process. Changes in material quality, for instance fluctuations in hardness, also show up as changes in the cutting force.
Changes in machine settings (feed and rpm) or even machine faults (main spindle bearing failure) are also reflected as changes in the cutting force. A monitoring system that measures cutting force should therefore be able to monitor not only the tool but also other aspects of the process.
Process Monitoring
Recent process monitoring equipment design concepts, such as for NC machines, multi-spindle automatic lathes and transfer lines, monitor the process on the basis of limits specific to the particular tool. In this way they can detect tool overload, tool breakage, machine running empty (no material), the trend of wear and collisions.
A memory function also gives the user an insight into the trend of variations in the process. The memory function displays the maximum force occurring in each of the last 112 machining operations, together with the corresponding monitoring limits. From the monitored and stored data, the shop can make conclusions about process stability, and fluctuations in material quality or the size of the machining allowance.
Other functions are also provided for assessing and optimizing the process. The “stop-go diagram” is the “patient’s daily temperature chart” for the machine, covering all machine stop-pages within the past 10 hours.
The stop-code memory lists the last 50 stop codes for the machine in chronological order, stating the time, the tool, and the NC slide concerned. This listing is used to create a diagram of messages per channel, which shows the frequency of stop signals for each tool. This gives clues as to what additional optimization adjustments may be necessary.
Further information on the reasons for stoppages is given by the stop-code diagram. The totals shown in the stop-go diagram are subdivided by each tool and each reason for stoppage. Additional clues that help optimize and master the process are given by the frequency distribution of force values for each tool.
The mask “running time factor” is especially useful for optimizing utilization of the machine. The idea behind this is that the machine is only truly productive when it is actually cutting metal. This mask shows actual cutting time in relation to the time when the tool is in the working turret position but is not actually cutting.
These analysis charts graphically show potential areas for optimizing the programming of each tool. Totaling these times gives the effective production factor for the entire machine, and it clearly shows up any weak points in the organization of the work.
Cost Effectiveness
Merely continuing production through coffee and lunch breaks alone can give 10-12 percent more parts produced per shift. This means that the payback period for installing such a system is very short. Even without considering additional benefits such as detecting tool breakage, collision control, and so on, the system can repay its cost solely by allowing production through worker breaks.
Production through breaks and into a third unattended or lightly-tended shift also improves product quality, since the machine as a whole remains in a stable thermal condition. Whatever the existing condition of the process, it is always possible to aim at and achieve improvements step by step. This process development method enables the shop to gain better mastery over its manufacturing, quality and product, while lowering costs.
RELATED CONTENT
-
Compact Second-Op CNC Mill Gets Makeover
New control and programming capabilities make this small VMC well suited for second-op work or use as a standalone production milling machine.
-
5 Steps to Digital Manufacturing
Industry 4.0, what some call the Fourth Industrial Revolution, is a move made toward digitization.
-
Making Parts on a Swiss/Laser Machine
Adding laser cutting to Swiss-type machining is helping this shop do more work for its customers in the medical industry.


