Finding the Right Insert Eliminates Need for Second Machining Center
Read about this shop that could have added a second machine and fixtures to perform an additional process, but instead, decided to work with the Mori Seiki NH 4000 horizontal machining center that it already had in-house. The company elected to use two 90-degree milling heads to machine the flats that are made of 4140 steel.
Edited by Lori Beckman
“Work with what you’ve got.” Most people have heard this motto before, and many live by it. Just as it helps individuals stay on track to reach a goal, save money, or save time, it can do the same for a machine shop. Take Machine Tool & Gear (Corunna, Michigan), for instance. This company was founded in 1927 and specializes in precision manufactured products and machines for the transportation industry. Recently, it was faced with addressing a new truck shaft design, including a flat area that must be machined at 90 degrees from the other operations performed on it.
One solution was that the shop could have added a second machine and fixtures to perform the additional process, but that would have been cost-prohibitive, and would have increased processing time. So instead, the company decided to work with the Mori Seiki NH 4000 horizontal machining center that it already had in-house. MT&G Manufacturing Engineer Jeff Ochodnicky elected to use two 90-degree milling heads to machine the flats that are made of 4140 steel.
Featured Content
However, this created a number of problems, including excessive tool wear and unacceptable surface finish. After trying various spindle speeds, feed rates, depths of cuts and inserts, Mr. Ochodnicky turned to Horn USA Applications Engineer Brett Kischnick for help. “It wasn’t the machine,” he says. “It was the cutting tool insert.”
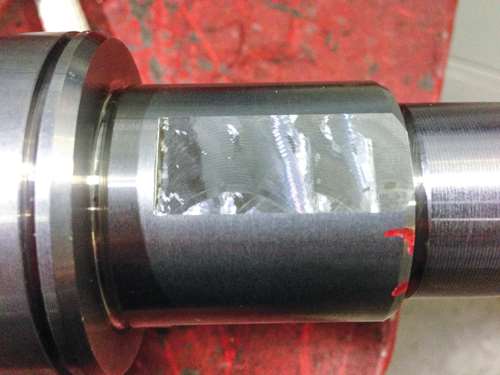
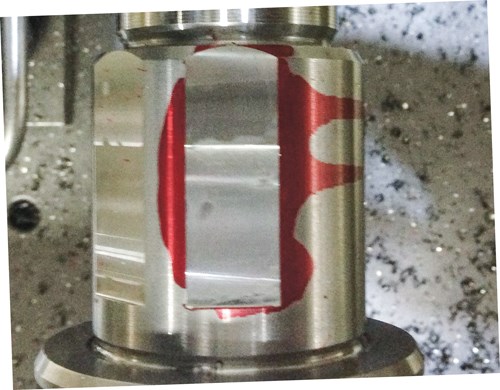
The challenge was to mill a 1.500-inch long flat, 0.060-inch deep on a shaft using a 0.854-inch diameter cutter hanging more than 10 inches out of the spindle, while producing a 30-microinch Ra surface finish. The cutting insert Machine Tool & Gear was using was a staggered flute design that caused pushing and pulling during the cut.
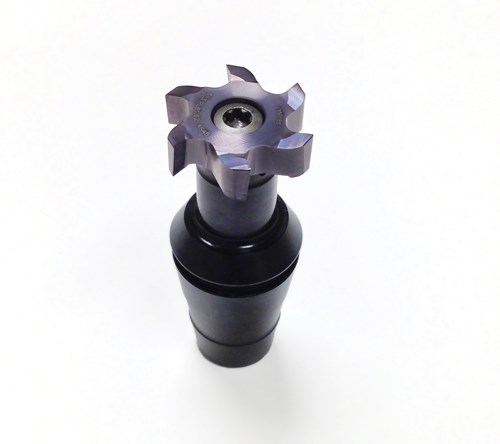
This was replaced with the Mini Mill insert by German cutting tool company Horn (with manufacturing in Franklin, Tennessee). The tool applies all cutting forces downward and frees up the cut, using a positive axial helix. The cutter was tested on the shop floor and did not interrupt production because the shop was in setup mode and could not yet produce parts to print until they solved the tooling problem.
To achieve the desired surface finish without adding an additional step between the two passes required eliminating even more cutting pressure by reducing the teeth in cut from six to three, increasing the surface feet per minute and making a rough cut first, leaving 0.002 inch for a finish pass. MT&G also moved the finish pass away from the 0.060 high side wall left from the rough pass. Because multi-directional tool pressure causes a poor surface finish, relieving the side pressure by only a few thousandths of an inch helped produce a 15 to 20-microinch Ra surface finish without adding a step between passes.
According to Mr. Ochodnicky, “The final running parameters are 715 surface fpm, 0.058-inch depth of cut for roughing, 0.002-inch for finishing, and 0.004-inch IPT for roughing and 0.002-inch IPT for finishing. I was very impressed with Horn USA’s knowledge, and how they took the time to help solve the problem. As a result, we’ve saved the expense of buying another machine tool and kept additional labor costs involved with it out of our process.”
Since it’s a new job, time will tell about production rates, as the process is refined. However, with the quality specs in line, the future for producing this job efficiently is positive.
For more information from Machine Tool & Gear, visit machinetoolgear.com.
RELATED CONTENT
-
The Many Sides of Workholding
Here's a broad look at different ways to approach workholding, from bar feeders to collet chucks to robotics.
-
Calculating Surface Footage and RPM for Optimum Tool Life
Tech Brief: Calculating Surface Footage and RPM for Optimum Tool Life
-
Tools and Technologies for Deep Hole Drilling
Understanding the challenges of deep hole drilling and knowing how to select and apply the appropriate tools will help a shop profit from this operation.


.png;maxWidth=970;quality=90)