Micro Measuring
Making micro sized parts is one thing; measuring them is another.
#micromachining
Measuring precision parts that are too small to see presents its own set of challenges. To find out how one shop successfully accomplishes the task, I visited American Micro Products Inc., a 53-year-old precision machined parts manufacturer in Batavia, Ohio.
The company was founded by Gerard Paroz as a job shop. A Swiss emigrant, Mr. Paroz grew up in a culture where machining small parts is a way of life, and the Swiss-type lathe was the machine of choice to manufacture them. Today, the shop employs 120 people in its Batavia location and has established joint ventures in Europe, Malaysia and China.
Featured Content
Its key customers are large OEMs in industries such as aerospace, diesel/off-road vehicles, fluid power and medical/dental. Many of its customers have a global presence in Asia and Europe, which makes the joint ventures an efficient means of near sourcing them. However, all design and engineering is done at the company’s U.S. headquarters.
Some of the shop’s capabilities include precision machining of diameters from 0.004 inch to 3 inches and lengths to 24 inches with tolerance capability to 0.00008 inch. It machines materials that include steel, stainless, aircraft alloys, aluminum, precious metals, copper alloys and others. The shop’s quality department is QS 9000/ISO 9002 certified.
Follow that Part
Our host at American Micro was Dana Massie, manager of the shop’s continuous improvement program. The program is charged with identifying and implementing better processes and technologies for quality assurance. The morning of my visit, I sat in on a meeting with Ms. Massie’s team, where she gave the day’s assignments and listened to individual reports on previous assignments. I got the sense that her employees are highly skilled and dedicated to the job of shipping only the highest quality products to the company’s customers. Moreover, they know how to blend the art and science of inspection to make that happen.
After the meeting, I sat down with Ms. Massie and quality technician, Al Thomasson, CQT. Between the two of them, they have more years in the quality business than the length of time American Micro has existed.
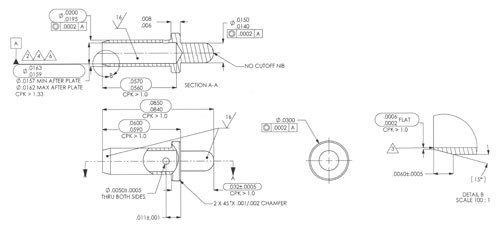
My mission at the shop was to find out about how it deals with some of the unique measurement and inspection challenges of very small, micro-sized parts. One such part, a barrel, is so small that 200,000 of them can be held in the palm of the hand.
“What makes these parts unique,” Ms. Massie says, “is the fact that the tolerances on them and the dimensions needed to be inspected are so small, most normal inspection equipment, micrometers, calipers and so on can’t pick them up. It takes a capital investment to be able to inspect these parts.”
Basically, there are three predominant methods of dimensional measurement. The first method, optical, is where the part’s features are imaged and projected using a camera. A second method uses a laser to measure reflected light from a point source. The third, tactile, uses a touch trigger probe to measure various surfaces. Points are gathered by the probe and compared with the desired dimensions.
While American Micro uses all three types of measurement techniques as required by the type and size of the part, most of the micro-measurement is done using vision systems. On the barrel part, there is a cross-hole feature that is 0.005 inch in diameter.
According to Mr. Thomasson, “A laser beam is generally 0.007 inch in diameter, so it would be difficult to stage the part so you don’t get an error. Moreover, there are features on that part even smaller than the cross-hole. As for a touch probe, finding a stylus that small and a trigger that sensitive would be difficult on these parts.”
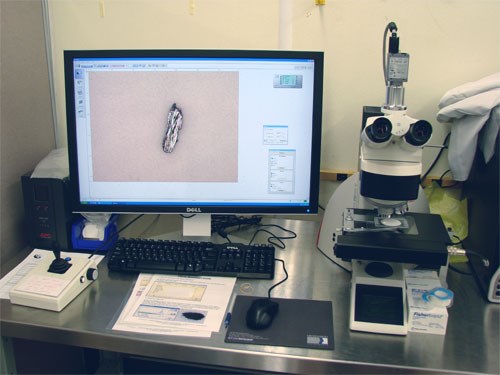
One of the metrology investments made by the company is a particle-counting microscope. “It’s the only such instrument in the area,” Ms. Massie says. “And it has proved invaluable already.
“We had a reject on this barrel part due to a nib on the radius,” she explains. “At magnification 500×, the customer called out a 3-micron nib, which had to be measured at that high magnification to verify it. With this new microscope, we are able to see as much as 900× for particle counting. This exercise led to a process change on a Swiss machine that was making the part.
“There is a lesson in this,” Ms. Massie says. “While the print calls for no nib, the customer must tell me at what magnification. At first, they specified 60×. Well at 60× that part passes. Now at 500× the customer will not accept the part. Measuring micro-parts can be somewhat subjective, and as the inspection equipment gets better it’s increasingly important to agree with the customer on how good is good enough.”
Setting the Stage
Handling micro-machined parts is a challenge. American Micro calls this process staging. If you can’t consistently position a part in a gage, it’s pretty difficult to get accurate measurements because you add error.
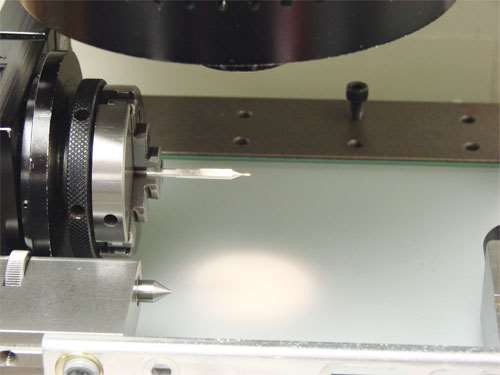
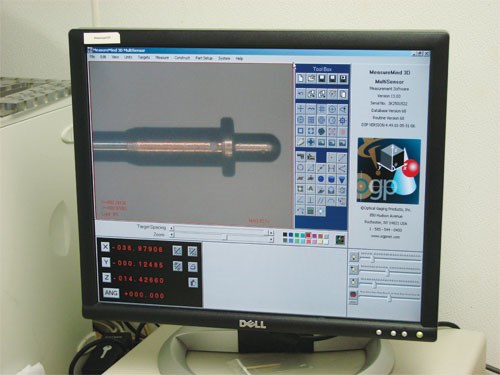
One feature on the barrel part is a 0.020-inch blind hole. The technician mounts the barrel bore on a precision ground pin, and then clamps the back side of the pin in a precision chuck mounted on the gage table. This locates the part under the optical gage camera. The company uses a Smart Scope from Optical Gaging Products for this measurement. It has a capability of 200× magnification.
A big improvement in staging has come from some of the automatic features incorporated in the newer gaging products. “These machines automatically adjust themselves in the correct XYZ orientation and datum once the part is staged,” Mr. Thomasson says. “It’s a programming function, which saves time for the operator. Before these newer machines, the operator had to orient the part manually, which could take 30 to 45 minutes. Now, with auto-center and auto-tilt, setup is about 3 minutes.”
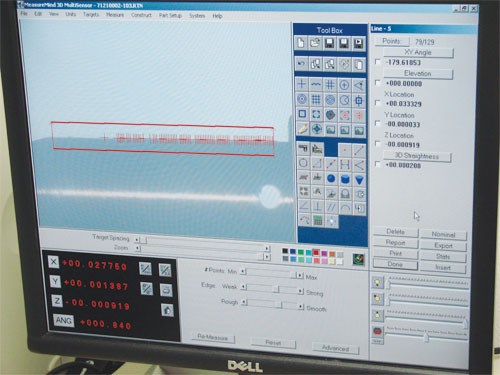
The actual measurement of the part has also been enhanced on these newer machines. The barrel we’ve been talking about has ten features with 55 measuring steps required. It takes the machine 20 seconds to cycle through the part on the OGP Zip 250.
“Generally, we run samples of 300 parts through the inspection process,” Ms. Massie says. “This is done after we perform a Gage R&R to cross check our measuring equipment against other machines to make sure it’s compliant. On close-tolerance micro-parts, it is important to have a handle on what may be inducing any error in the tolerance—the machining process or the inspection process.”
Better Equipment Impact
“An interesting thing has happened because we have installed this more accurate equipment,” Ms. Massie says. “Our operators were used to dealing with micrometers, calipers and optical comparators. Many of the operators have run parts maybe 5 to 10 years and the parts always passed. An optical comparator is subjective, and hand measurement has variation potential as well.
“Suddenly, we get a new piece of equipment like a Smart Scope—it’s very accurate, it sees everything, and it’s computer generated and doesn’t rely on the human eye. Now, in some cases, we have to prove to the operator that for all these years, his part was not to print. It’s not that the operator has been measuring poorly; it’s that the better piece of equipment can now show that the part was out of print.
“Of course, that throws up another flag,” she continues. “Even if we’ve been out of print all these years, the part is obviously functioning. The question for us is what if we now make the part to print and it doesn’t function. Well that’s a big risk to take. The bottom line is, we got better.”
New Needs
The room that contains the particle counting microscope looks more like a chemistry lab than a metrology department. It has beakers and a pump and filters that service the particle counting process.
“We were driven to purchase this new piece of equipment by a customer we make fuel injectors for,” Mr. Thomasson says. “Because machining of these parts has gotten so accurate, the engineers are eliminating traditional seals in favor of metal-to-metal seals. This requires these parts to be very clean and verifiably so.
“These parts have a particle size tolerance that can only be verified by a piece of equipment, like the particle counting microscope,” Mr. Thomasson says. “Parts are first cleaned in super clean solvent and then ultrasonically cleaned as well. The parts and the solvent are then pumped through a ‘patch’ which is an ultra-fine filter, in the 5-micron range.
“The patch is dried and placed under the microscope, which then automatically scans 200 sectors on the patch looking for particles of a programmed size. The tolerance for passing consists of a maximum particle size and number. We used to do this on the Smart Scope, but the cleanliness standards became too tight for the machines’ 200× capability.”
Down the Road
Micro-measurement continues to make strides. It’s almost a leap-frog game between how small and complex parts can be machined and the technologies available to accurately and consistently measure them. The trends in auto, aerospace and electronics, to name a few industries, are all reducing the size and weight of components, which means more micro-machining and measuring.
“I see nano-machining and measurement as the next frontier in both production and inspection,” Ms. Massie says. “It’s in the interest of American Micro and metalworking shops in general to keep themselves informed about the new technologies on the horizon and try to be ready when they appear. I also believe that continuously improving processes and investing in technologies that deliver better throughput, less scrap and improved efficiency in order to maintain margins are key to survival.”
RELATED CONTENT
-
Purpose Built Micromachining Center
In metalworking, it is rare to find new approaches to well-established technologies; usually new developments are major or minor upgrades to known elements. This micromachining center is rewriting the rulebook.
-
Understanding Micro-Milling Machine Technology
Micro-milling can be a companion process to turning-based production machining. This article looks at some of the technologies that go into a micro-milling machine and why they are important to successful operation.
-
Making Micro Threads
Production of micro threads can be challenging, but using the most suitable tools for a given application can simplify the task.


