Thread Verifier Eliminates Rework
Many applications require thorough inspection to prevent improperly tapped holes from reaching final assembly.
Many applications require thorough inspection to prevent improperly tapped holes from reaching final assembly. Thread gaging allows 100-percent inspection of each thread with a full-contact thread gage. As long as a part meets the predetermined set of control parameters, the mating part will fit.
Labor intensive manual gaging of threaded holes is one option, but brings with it potential problems in both speed and accuracy. Automated thread gaging can be as much as 20 times faster than manual checking and eliminates the possibility of human error associated with manual checking.
Featured Content
Efficient Automation
To eliminate manual gaging, expensive rework and field audits, the Eagle Thread Verifier (ETV) automatically identifies and alerts operators of conditions such as thread depth, size, location, squareness, untapped holes, broken taps in holes, and incorrect pitch diameter. The unit can stop the production line in seconds if a hole is not identified to the pre-established specification level, or it can signal rejection of an unsuitable part. Corrections to the tapping process or tool replacement can be made immediately, eliminating further inaccurate production.
The Setup
In operation, a commercial single- or multi-spindle, motor-driven, certified test gage rotates within a tapped hole and monitors the torque. A visual torque monitor provides a real-time digital display of the torque reading. The ETV control compares the torque values with predetermined minimums and maximums and indicates whether the holes tested are to depth, to the proper size, in the correct location and square to the part surface. Even at
high production rates, the unit can consistently complete test cycles in seconds, keeping existing production cycles to a minimum and avoiding errors that can happen through manual gaging and inspection.
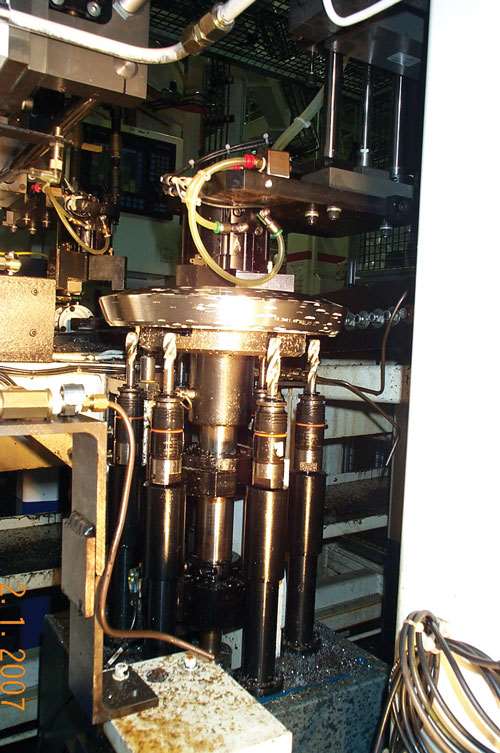
The ETV can be mounted on a machine slide in a production environment to prove and verify the proper thread at the point of machining. Unlike with many other systems, coolant, oil and chips will not lead to false readings. As the thread gage rotates and goes into the through-hole, it pushes chips out the other side. Coolant and oil can actually create an advantage, helping to lubricate the gage.
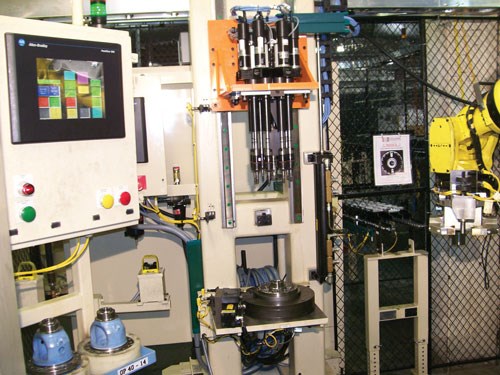
The system can also be set up as an independently controlled, stand-alone station to check thread depth and size before workpiece shipment or assembly. Whether stand-alone or within the production environment, automatic multi-spindle motors can be arranged to check complete hole patterns simultaneously. A printed report can be generated to certify the inspection of the tapped holes, allowing a visual display of the gage results.
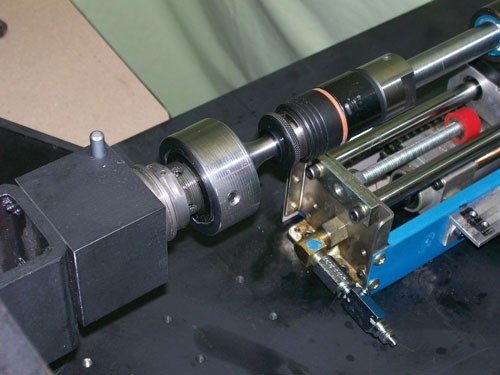
Many gaging systems are dedicated to a specific application, designed and built for a certain part or work cell. The ETV provides added flexibility, allowing reuse of the slides and toolholders across different systems. It can be removed from the existing cell or system and moved to another without the need for additional spindles and other components.
For change-over when thread checking a new part, the operator changes the mounting bracket for the new hole locations and replaces the thread element in the quick-change chuck. With 0.06 TIR radial float, the chuck eliminates the need for precise part positioning. The flexibility
of this quick-change feature minimizes thread inspection cost per hole.
The ETV spindle can be added to an existing cell, or Eagle Thread Verifier engineers will design and build a manual or automatic load turnkey system to fit a specific application.
Capabilities
For cases of checking go and no-go thread size, the company has designed a gage for through tapped holes that features a go gage at the lead end of the gage, a 1/8-inch wide relief, and then a no-go gage where the pitch diameter is about 0.003 or 0.004 oversize. If the gage is able to go a predetermined amount deeper into the hole than the design permits, the no-go gage enters the threaded hole and the part is rejected.
The gage can also detect the depth of a chamfer or counterbore at the entrance of the centered hole. The gage searches for a start point as it comes down to the hole. It touches off at the beginning of the hole, at the bottom of either the chamfer or the counterbore. If the gage does not reach that start point, it tells the control that the chamfer or counterbore is either too deep or is not there at all.
The torque of the motor allows for the added benefit of minimal material removal in some gaging applications.
In one case, for example, a company was projection welding studs onto sheet metal parts, and weld spatter was ending up in the threads. Using a tap as the gage, rather than rejecting parts that had foreign matter in the threads, it was able to remove the weld spatter and make the parts acceptable. The motor does not have enough torque, though, to re-cut the actual thread, so the pitch diameter will not be changed. OD threads are handled the same way using a thread die.
To justify the cost of switching from manual checking to automatic thread gaging, a shop should consider the process’s accuracy and speed, as well as the time and money that could be saved in returned parts or sending support personnel out to correct problems. And better quality parts are always good for business.
RELATED CONTENT
-
An Overview of Metrology for Precision Machining
Metrology helps precision manufacturers ensure the parts they produce fit and work as intended, despite the different languages, processes and measurement systems used.
-
Reducing Downtime With Tool Presetting
It’s an ongoing challenge. To remain competitive, shops must find new and more efficient ways to increase production. Often they look to new, faster and more precise machine tools as the answer. Sometimes experimentation with a variety of different tooling
-
Automated Inspection on the Shop Floor
Most machine shops understand the value of automation when it is applied to such operations as turning, milling and grinding.


