Four Steps to Better Equipment Effectiveness
Lean manufacturing typically gets the spotlight as the path to profit, but before you can have a lean operation, you need to get your processes under control.
Lean manufacturing typically gets the spotlight as the path to profit, but before you can have a lean operation, you need to get your processes under control. Lean assumes a machining process that is predictable, repeatable and capable of producing conforming parts. At a time when it’s imperative to reduce operating costs, a four-step approach to increase process capability can yield substantial improvements in labor, scrap, inspection and overall equipment effectiveness, while moving a big step closer to your lean manufacturing goal.
The key to predictable productivity is elimination of variation at its source, controlling it from the bottom up in four steps:
Establishing stable machine operating conditions and environment. These are preventive controls that reduce sources of variation before machining starts.
Process setting, which deals with predictable sources of variation, such as location of the part, size of tools and offsets—anything that could cause a non-conforming first part.
In-process control—delivering intelligent feedback to the process.
Post-process monitoring, often done offline, ensures both the process and part are checked against specifications.
Components to examine or implement in Step 1 include design for manufacture, based on a thorough understanding of current capabilities and reliance on best manufacturing practices, rather than reinventing the wheel. Engineering around ”standard” part features, tooling and processes reduces variation and allows engineers to make far-reaching improvements when new best practices are identified. Other components of Step 1 include controls and standardization in cutter geometry, clamping forces, part programs, workpiece preparation, ambient temperature, process-generated heat, machine/fixture cleanliness, tool-life management, machine calibration, necessary refurbishment and routine condition monitoring. Consistent conditions at the start of the process set the foundation for consistent results.
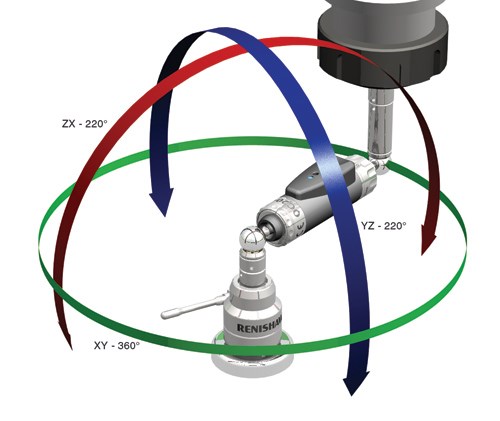
Step 2 — process setting, tackles errors in setup of the machine, part, tool and probe that are always present to a degree and must be correct to achieve first part/good part. Building on Step 1, process-setting controls help eliminate human error by automating manual processes. Machine setting involves establishing relationships between key moving parts, such as spindle/bed. Uncorrected machine errors can be a dominant factor in process non-conformance, possibly causing extended setup times because the effects can be confused with other sources of process variation. Probes must be datumed to accurately measure on the machine. This involves measuring the size and position of the stylus with a datum sphere or ring gage. A tool arbor can be used to establish the position of a stylus or laser beam for toolsetting devices. Weekly probe calibration ensures other measurements are reliable. Part setting with a probe—which eliminates human intervention—establishes location and orientation of the workpiece to align the machining program. The final element is tool setting where length and diameter of tools are established and stored in the CNC.
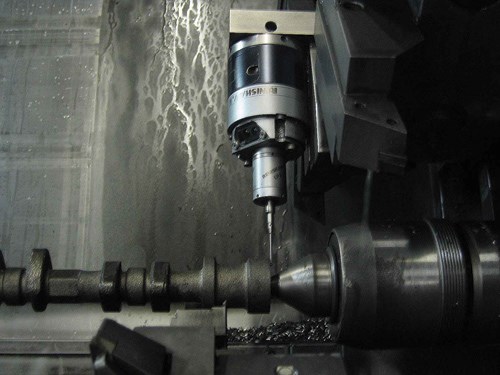
Step 3 — in-process control, assumes Steps 1 and 2 are in place. This step addresses obvious variables, such as temperature and tool wear, using probes. If only a few tools are used in the process, there’s no need to probe every part feature. One need only check a critical feature produced by each tool using a touch probe, and update the tool offset. Give strong attention to the work of roughing tools during probe cycles. If a rough feature is inconsistent, the finishing cut may be, as well. Re-datum the spindle position, rotary table centerline or pivot points on mill-turn machines regularly, but especially before finishing operations. Check delicate tools after each cycle. Put logic in the program to let the machine use probe feedback to call up new tools or repeat passes. Log in-process measurements and offset updates for traceability.
Step 4 — post-process monitoring, is performed by most shops using machine tool probes, handheld gages, articulating arms and CMMs. At this stage, these are reactive controls, performed too late to influence the component being measured, unless rework is possible. Post-process measurement with the part in the fixture makes the most sense for large, high-value parts. CMM-style checks, including GD&T, can also be performed on the machine tool, but will be less precise and traceable than those done on a CMM, where measurement cycles may be shorter, too, because of new technologies such as five-axis scanning. CMMs equipped for five-axis scanning will also be faster and more comprehensive in measuring complex shapes. CMM measurement results and point data are easily stored for long-term traceability.
Without making any fundamental changes to the machining process, implementing these four steps can yield substantial recurring cost savings. These steps should be applied from the bottom up, as each one builds upon the other. Every up-to-date shop would benefit from having at least Step 1 in place.
Related Content
The Value of CMM Controller Retrofits
In this case, new controllers for two coordinate measuring machines — one 26 years old — with new programming software offers the possibility to enable multisensor inspection of critical, turned aerospace components.
Read MorePrecision Machining Technology Review December 2022: Measurement
Production Machining’s December measurement showcase includes some of the latest technology from Haimer, Hamar, Sunnen, OGP, Marposs and Zeiss.
Read MoreDoes a Scanning Probe Make Sense on a Swiss-Type?
Swiss-types have limited tooling capacity, but there can be advantages to giving up some of that capacity to take advantage of a touch probe — in fact, a scanning probe — to enable in-process part measurements.
Read MoreKeeping Watch on Small Parts
From watch parts to exotic medical applications, this shop takes on the world of micromachining.
Read MoreRead Next
Fielding Manufacturers’ FAQs about CMMC
Here are answers to frequently asked questions we as a provider of testing, consulting, information and compliance services receive about Cybersecurity Maturity Model Certification.
Read MorePredicting the ROI of Robotic Automation
Various methodologies paired with online tools can help small to mid-sized manufacturers determine how to predict and calculate the potential economic benefits of robotic equipment for their specific needs.
Read MoreAvoid the 7 Deadly Sins of Manufacturing
Identifying and preventing these manufacturing sins will reduce or eliminate unnecessary waste, improve efficiency and productivity as well as protect profitability and cash flow.
Read More


