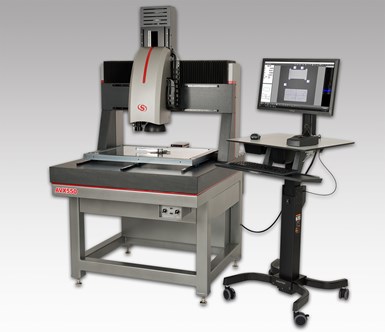
Starrett Large Multisensor Vision System Optimizes QC Process
Appears in Print as: 'Large Multisensor Vision System Optimizes QC Process'
System has dual optical systems and touch-probe capability to measure parts with a diverse range of feature sizes and geometries.
Edited by Angela Osborne

AVX550 Multisensor Vision System
The L.S. Starrett Co.’s AVX550 Multisensor Vision System is an easy-to-use multisensor measurement system that streamlines and optimizes the QC process. It is equipped with dual optical systems and touch-probe capability to accurately measure parts with a diverse range of feature sizes and geometries. The large-format system can be equipped with two cameras and lenses to be used sequentially in the same program along with touch-probe options. The system features a granite base and bridge design to enable accuracy, durability and stability for use in demanding requirements.
Using a single system, production parts can be examined on the shop floor or in the QC lab on macro and micro levels as one comprehensive process. The dual optical systems work in tandem to measure a broad range of features. The primary zoom lens enables small, intricate features to be inspected with high precision and resolution of down to 2 microns. A secondary large field-of-view camera is equipped with a telecentric lens that can simultaneously inspect large areas of a part or an entire part itself. A broad range of zoom options also enable measurement configurations that can be custom tailored to meet specific application requirements, and eliminates the need to change lenses or recalibrate the system. Throughput is further enhanced with fast platform travel speeds and dual collimated profile lights.
The system is equipped with the M3 software package from MetLogix, a traditional mouse and a touchscreen monitor that makes user interaction easy and intuitive. Auto part recognition enables creating a part measurement program that comprises the desired features of a part for inspection, which can automatically be saved in the system or to a network. Programmable light output options can be built into the program as defined steps, including being called up as the part recognition program initiates. For fast, accurate and repeatable results once the program is created, placing that part within the camera’s field-of-view allows for the saved program to initiate and run the inspection. Features such as a “Superimage” function enables piecing together multiple camera frames in order to view a large part as one single image. A Renishaw touch probe may also be utilized for quick acquisition of discreet points along a part’s profile and 3-D geometry mapping.
The system has several options for lens configurations. For inspection of small, intricate areas, a 12:1 zoom optics lens is equipped with a 26X to 310X magnification range for precise resolution. The fixed magnification telecentric lens comes with magnification options of 0.14X, 0.3X, 0.5X, 0.8X, 1.0X 2.0X and 4.0X. Systems can be configured in a larger measurement range on the X, Y and Z axes, and can also be equipped with Q-axis rotary positioners for increased capability.
RELATED CONTENT
-
How to Choose and Use Styli
The variety of probe applications on machine tools, CMMs, comparative gages and portable arms makes correct selection of styli usage essential for efficient, reliable and accurate measurement. Here are some key points that can be helpful in choosing the best measurement solution.
-
Measure 3D Parts Without Losing Time
This high-speed metrology and inspection system is said to process complex geometries faster than traditional inspection methods.
-
Precision Machining Eastec Technology Preview September 2021
Production Machining highlights some of the latest precision machining advances and technology updates that will be showcased at Eastec 2021, Oct. 19-21 in West Springfield, Massachusetts.


