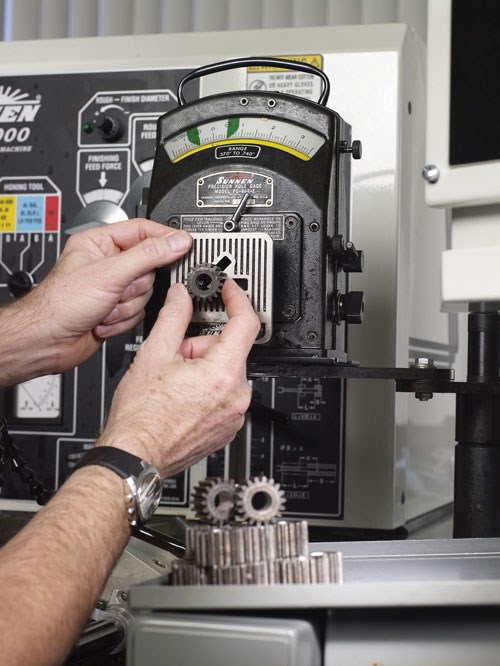
Electronic Dial Bore Gage
It’s another one of those “necessary evils” that shopfloor employees often don’t appreciate the significance of.
It’s another one of those “necessary evils” that shopfloor employees often don’t appreciate the significance of. The so-called non-value-added operations often seem to be a hassle, but when they add to the quality of the product, who really can deny the value?
While gaging is an additional step in the production process, it is important in ensuring that a shop is meeting its required tolerances. It plays a significant role in determining the accuracy of a bored hole, and it can also help to predict remaining tool life through variations in tightness of the gage in the part. But the effectiveness of the gage is directly related to the operator’s ability to accurately read its display.
Sunnen Products now offers optional, large-readout electronic indicators on its entire range of dial bore gages. Highly visible in the shop environment and a quick reference for multitasking operators, the electronic dial bore gages feature precision indicators with 6-digit LCD readouts, 11-mm character height and three large buttons for easy operation. Capable of checking bore sizes from 0.054 inch (1.37 mm) to 12 inches (300 mm) and bore lengths as long as 24 inches (600 mm), the electronic bore gages allow users to set upper and lower tolerance limits for go/no-go judgments, which are then displayed in full-size characters. Standard analog indicator-equipped gages read out in tenths (0.002 mm); models with five-tenths (0.010 mm) readouts are also available. Operators can easily toggle between inch- and metric-measurement readouts. The gage is available in 34 different standard diameter/length ranges, as well as optional lengths.
The electronic indicator dial bore gages, accurate to ±0.00012 inch (±0.003 mm) with 0.00005 inch (0.001 mm) resolution, provide the ability to perform scaling calculations, judge tolerance, hold data and perform general comparison measurements. Internal calculations using a simple [F(x)=Ax)] formula are also possible. Using the formula requires mounting the indicator on a measuring jig, and setting the calculation factor (to any value) allows direct measurement without using a conversion table and improves measurement efficiency. This means that the indicator can be programmed with a conversion, and the bore ID is displayed rather than the amount the bore varies from perfect (zero on the display).
The company says the gages are ideal for shops honing production runs of parts that require SPC data at multiple points in the bore. Data output via an SPC cable enables direct transfer of bore measurements to a computer for use with SPC software. Optional wireless data export to a computer is also available. A transmitter is connected to the gage, and the receiver is connected to the computer. The transmission range is approximately 60 feet.
The indicator face displays the spindle’s actual position via an absolute linear encoder capable of relocating the origin, even after the power is turned off, for quick-start, multi-point measurement. The positive/negative count resulting from the spindle’s up-and-down movement can be toggled, and the indicator face can be rotated 330 degrees so it can be read at virtually any angle.
Gage centralizers are adjustable to ensure proper centralization over the entire diameter range, resulting in accurate centering action, even if the gage is tilted off the bore axis. A right angle attachment is available for conditions where the gage is difficult to read or total gage height is an issue. Blind hole probes and probe extensions are also available. Probe extensions are 2.5 inches (63.5 mm) long, and as many as three extensions can be assembled together.
Most models feature all-carbide gaging points for applications where exposure to extreme wear conditions, such as heavy production, rough workpieces or abrasive materials, is a factor. All dial bore gages are designed for the machining environment with a dust/water protection level of IP42 or IP53. Battery life, under normal use, is approximately 5,000 hours.
When bore quality assurance is required, it makes sense to use gages that make the job easier and repeatable.
Related Content
The Value of CMM Controller Retrofits
In this case, new controllers for two coordinate measuring machines — one 26 years old — with new programming software offers the possibility to enable multisensor inspection of critical, turned aerospace components.
Read MoreHow Well do You Know Granite Surface Plates?
Here are some tips for choosing, maintaining and customizing a granite solution that will best meet your shop’s particular inspection needs.
Read MoreHow To (Better) Make a Micrometer
How does an inspection equipment manufacturer organize its factory floor? Join us as we explore the continuous improvement strategies and culture shifts The L.S. Starrett Co. is implementing across the over 500,000 square feet of its Athol, Massachusetts, headquarters.
Read MorePrecision Machining Technology Review: September 2025
Production Machining’s September 2025 technology showcase includes some of the latest technology from Siemens, United Machining Systems, Mazak, Nikon, IMCO Carbide Tool Inc. and Okuma America Corp.
Read MoreRead Next
Tool Feed Technology Enhances Production Honing
Nothing throws a wrench into a production machining operation like variation in the incoming parts.
Read MoreHow To (Better) Make a Micrometer
How does an inspection equipment manufacturer organize its factory floor? Join us as we explore the continuous improvement strategies and culture shifts The L.S. Starrett Co. is implementing across the over 500,000 square feet of its Athol, Massachusetts, headquarters.
Read MoreFinding the Right Tools for a Turning Shop
Xcelicut is a startup shop that has grown thanks to the right machines, cutting tools, grants and other resources.
Read More


