A 'HOLE' New Ballgame With Multi-Spindle Honing Systems
Automating the honing process is key to high-volume precision bore production with sub-micron accuracy.
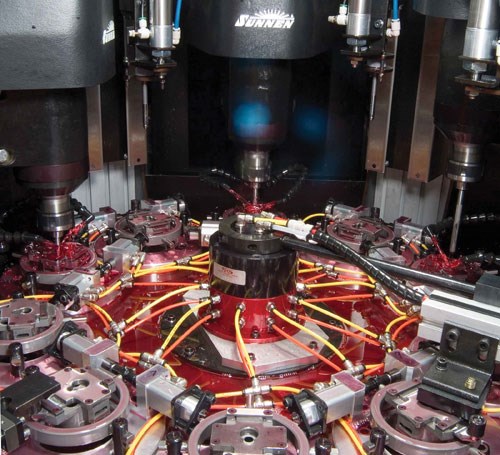
Manually controlled, horizontal honing machines will probably be on shop floors for many more years, but a new generation of vertical CNC, multi-spindle machines has emerged in the last few years that is transforming “honing” into high-volume precision bore machining. Equipped with in-line air gaging for process and tool feed control, these machines are being rapidly adopted because of their exceptional precision, process capability, output and ease of automation. Individual machines—configured as automated cells—are now producing more than 15 million parts per year, with high process capability and accuracies of 0.25 to 1.25 micrometers (0.00001 to 0.000050 inch).
Why Multi-Spindle?
Makers of small engines, hydraulic valves, gears, compressors and pumps, to name a few, are driving a renaissance in honing as they strive to make their end systems reach a higher performance level. The key issue is producing tight component tolerances with high process capability (Cpk).
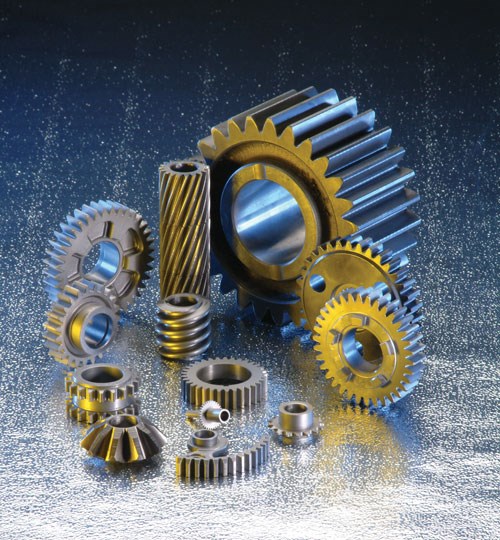
Whenever a part rotates on a shaft or a piston slides inside a bore, performance-oriented manufacturers are adopting honing to improve their products by tightening tolerances. The goal is gearboxes and transmissions that run quieter, smoother and longer. It includes hydraulic systems that are more precise, responsive, efficient and leak-resistant as well as small engines that deliver higher power densities and produce less pollution. To produce these parts in high volumes, automation is the key.
Multi-spindle vertical honing machines are not completely new. Hydraulic versions of this platform have been around for years, but carry with them all the disadvantages that drove hydraulics out of other machine tools many years ago—cost, larger footprint, noise, heat, maintenance and performance drift. Single-pass honing machines are usually multi-spindle verticals, too, but lack the capabilities of a conventional hone for correcting geometric error in long bores and producing a true crosshatch finish.
A number of factors prompted the development of the new breed of all-electric, multi-spindle, vertical honing systems. By its nature, honing often requires two steps: a roughing step to produce the precise geometry and size of the part, and a finishing step to produce the surface spec. When a part has a blind bore or other features that might cause the abrasive tool to wear unevenly, stock removal and finishing steps are often separated. The need to hone increasingly complex parts with keyways, ports, blind bores, and so on in several steps makes an automated, multi-spindle machine a cost-effective solution.
New issues with part quality also make a multi-spindle system a cost-effective approach. A honing operation is most efficient when the arriving parts are high quality, with little stock removal needed. Despite this, upstream processes today, which may be fast and effective, often produce a spread of tolerances on parts that require more stock removal in honing to hit the size, straightness, cylindricity and roundness specs.
A changing workforce in the U.S. and Europe—focusing attention on labor and factory-floor efficiency—influenced the development, too. In the U.S., a generation of craftspeople who have honed parts on manual machines is now retiring. Today’s automated, multi-spindle machines have all the skills of these retiring craftspeople built into the control systems. In terms of floor space, the multi-spindle machine can reduce the requirement to one-third or less. Cycle times, likewise, are often halved.
Product Performance Drives Tolerance Reduction
It’s important to note that honing is a process of choice for makers of performance-oriented products because it precisely creates three key characteristics in parts in a way that no other process can: final size, geometry and surface finish.
Manufacturers have tightened the dimensional requirements for parts to achieve greater performance from end products—tighter sealing and less hysteresis, noise and vibration. Diesel fuel injectors offer a good example. Typical print tolerances are 0.0013-mm (0.000051-inch) straightness per side on the bore, 0.001-mm (0.00004-inch) taper in the bore, and 0.0013-mm (0.000051-inch) roundness. Manufacturers in production mode strive for less than 0.001 mm (0.00004 inch) on total measured bore variation when using scanning air gages, with roundness less than 0.0005 mm (0.00002 inch). They match fit plungers with 0.006- to 0.007-mm (0.00024 to 0.00028 inch) clearance, with a 0.001-mm (0.00004-inch) total tolerance on the fit. As the match clearance gets smaller, surface tribology and retention of a lubricating film become more critical.
This requires a much higher level of precision in component parts, increasing the likelihood that several steps will be required for honing. Overlaying the need for greater precision is the requirement for high-process capability, an area where servo-controlled honing shines.
When holes produced satisfactorily on lathes suddenly have to meet a process capability of 1.67 or 2.0 Cpk, turning operations may fall short. That kind of capability requires a process that’s easy to “dial-in” with high precision, and very stable once it’s established. For example, a lathe may get to a certain value, but if tweaked, a little will jump to a value out of spec and throw the process off. A computer-controlled hone can easily get within 0.00025 mm (0.000010 inch) of a specified size, and with the resolution on the tool-feed systems of today’s machines, the variability is small.
Conventional honing is inherently able to correct bore geometry (cylindricity, roundness, taper, size, straightness) with a reciprocating abrasive that contacts a large percent of the bore’s length. ID grinding can correct geometry, too, but works best for parts with larger (> 0.75 inch) bores and low length-to-dimater ratios (0.5-to-1). At a length-to-diameter ratio of 2-to-1, honing has a an advantage in speed of material removal, and more than a 5-to-1 length-to-diameter spindle deflection on an ID grinder might cause taper issues.
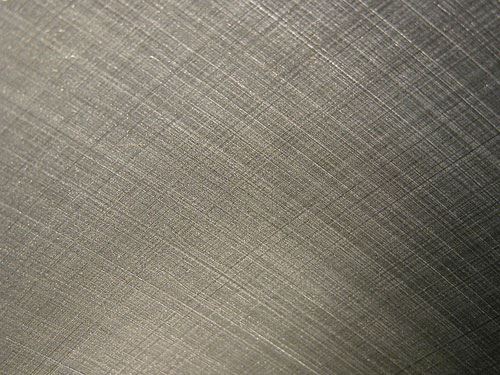
Neither grinding nor turning can produce honing’s characteristic crosshatch pattern on the bore surface. Conventional honing leaves a desirable crosshatch pattern on the bore, while finishing the surface to a given spec. The crosshatch can be thought of as two opposing helical patterns.
A bore finished with a single-point tool has one telltale helical pattern. The resulting “threaded” finish can lead to lubricating films being pushed out of the bore. If the bore serves as the outer race of a bearing, the finish from turning may lead to the needles in the bearing being pushed toward one end, causing premature wear and binding.
This crosshatch pattern can be controlled to produce a specific angle and depth (with plateau honing), which manufacturers use to manage the retention and distribution of lubricating oil films. Performance-oriented manufacturers are also paying greater attention to cylindricity and the surface parameters Rk, Rpk and Rvk (see box). Makers of hydraulic cartridge valves and similar components fine-tune these parameters based on the characteristics of the mating/sliding parts.
A 90-Degree Turn For Honing
Traditional honing is often a horizontal process where the part reciprocates. A horizontal process is fine for lighter parts, and the fixtures are inexpensive, but a vertical arrangement has a slight advantage because there is no potential for bending forces on the tool. Theoretically, there is an accuracy advantage to a reciprocating spindle and stationary part, particularly as part weights increase and tolerances are reduced.
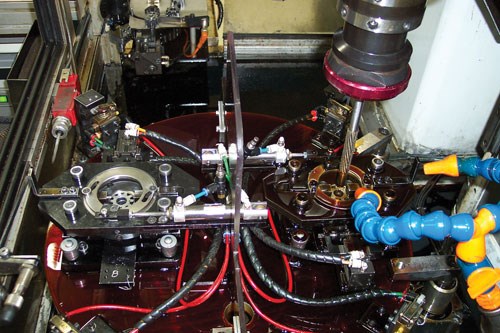
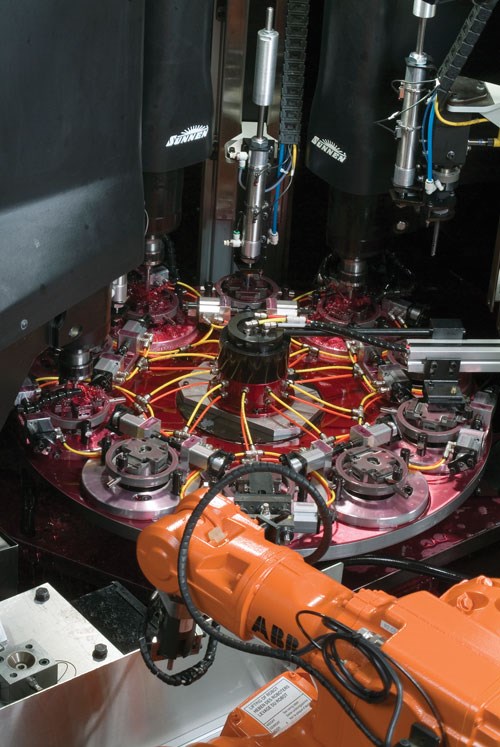
A multi-spindle vertical hone is also easier to automate. Untended vertical honing cells may integrate capability to measure a feature on incoming parts, such as bore size, then orient them, place them into a fixture, air gage them after each step, sort them by size after processing, orient them and sometimes perform secondary operations. Even in a basic single-spindle, manually loaded operation, a vertical machine can have multiple workholding positions to maximize spindle productivity.
The major engineering requirements for three machine platforms recently developed was the flexibility to use servo control in any axis of motion, including the stroking system, spindle rotation, tool feed system, machine movements and part indexing systems, depending on the model.
Servo stroking in a vertical platform is a significant issue. In a horizontal machine, this system is less expensive, the stresses on it are low, and it takes less power to drive it. Vertical designs have traditionally used a hydraulic drive or a four-bar linkage. In a vertical arrangement, the spindle mass has to be accelerated/decelerated at each reversal point, at rates to 400 strokes per minute. A new servo-driven ballscrew proved to be the only technology capable of withstanding this duty. This drive system was installed in a beta machine, which processed several hundred thousand parts per year during an extended test. Currently this stroking system is extremely robust, and far more precise and controllable than a hydraulic drive—approximately 400 percent more accurate.
Sunnen wrote the motion profiles for the stroking system, which is closed-loop controlled. This high-precision motion control allows the user to tailor the spindle action to optimize the honing process—not unlike what a craftsman would do in a manual
process.
Three Modular Platforms For Bores
To 300 mm (12 inches)
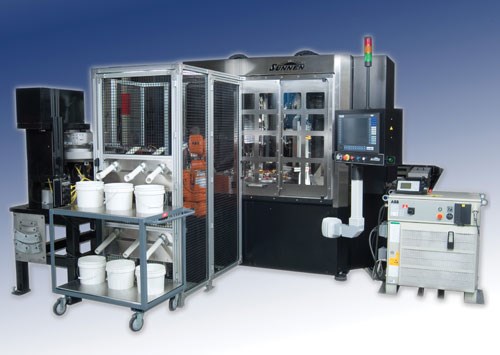
The new Sunnen SV-1000, SV-310 and SV-500 vertical CNC honing machine series represent the basic platforms on which honing is being transformed into automated precision bore machining. All are modular, engineered to scale up from a single-spindle job-shop machine to fully automated multi-spindle cells. Easily configurable, they are available with post-process inspection, along with special tooling, robotic integration, part orientation, gaging and other options needed for purpose-designed systems. The SV-310 and SV-500 also accommodate the hone head, which can be equipped for in-process air gaging. The SV-500 combines servo control of spindle rotation, stroke and tool feed. The servo spindle enables the machine to produce a constant crosshatch angle, end-to-end in the bore, responding to the technology needs of manufacturers in the diesel cylinder liner market.
SV-1000 series machines can size bores to accuracies of 0.001 mm (0.00001 inch). This machine is designed for part diameters of 3 to 65 mm (0.120 to 2.56 inches) while the SV-310 handles parts to 200 mm (8 inches) and SV-500 to 300 mm (12 inches). Any of the machines may be able to handle larger bores, depending on the part material and bore length. All are designed for lean production environments to permit rapid change-overs and reconfigurations from manual to rotary or linear part handling. From an operator’s perspective, all three machines have an identical look and feel.
The basic single-spindle SV-1000 module, for example, starts with a fixed tooling plate or servo rotary table. A cast-polymer base provides excellent vibration damping and structural rigidity, while removable guarding facilitates different processing options and future repurposing of the machine.
For unmanned cellular processing, the SV-1000 can be integrated with an Etamic CNC servo air gaging system. It provides post-process air gaging for closed-loop control of bore size and geometry, along with downloadable SPC data and feedback control. Matched with diamond-plated CGT Krossgrinding tools or MMT multi-stone mandrels, the air-gage-equipped machine can automatically control hole size to accuracies of 0.001 mm (0.00001 inch), eliminating the need for craft skills. A load-sensing tool feed system minimizes processing time by sensing where and how much to hone the bore.
The Right Tool For The Job
Sunnen’s MMT tool is a more traditional metal-bond super abrasive tool design. It is used most commonly with the SV-1000 machines. It uses a metal-bond abrasive, so cutting force is low, the abrasive is self-sharpening, and it produces a consistent surface finish from new to worn. The ability to manipulate the mix of the abrasive and bond gives the MMT tool a wide application range.
The Krossgrinding tool has an expandable diamond-plated sleeve that surrounds the tool. The sleeve design of the abrasive is well applied for parts with ports and keyways, because it resists the tendency to wash out the edges of these interruptions. Though it lasts many times longer than a metal-bond abrasive, diamond-plated honing tools work with a smaller window of suitable part materials and work best with very rigid parts. As the diamond begins to dull, this type of abrasive tends to push and plow metal, rather than cut it, requiring higher cutting forces, so it is important to consider part distortion during processing.
The new stroking drive provides the highest level of flexibility and consistency in spindle reciprocation to allow a new level of process optimization. Unique in the industry, it enables the SV-1000 to do both conventional honing and single-pass honing, using available adapters, to give the machine job shop versatility and return on investment.
A recent typical application for the SV-1000 involved production of spool valve parts for fluid power equipment. The hardened steel part (56-59 Rc) requires stock removal of 0.1 mm (0.0035 inch), with final part specs of 0.0008-mm (0.00003-inch) straightness, 0.0005-mm (0.00002-inch) roundness and a surface quality of 0.0125-micrometer (5-microinch) Ra. Varying wall thicknesses throughout the length of the bore make this a challenging part. The fully automated honing cell for these parts includes a six-axis robot, which takes parts from a bowl feeder, inspects the incoming bore, aligns the parts for proper fixture loading, and places them in the honing fixture. The three-spindle hone is tooled to remove different amounts of stock and produce the required finish in steps. At each station, the part is air-gaged and the honing process automatically compensated. The honing system sorts the parts into five classes, each separated by 0.0006 mm (0.000025 inch), corresponding to the size classes achieved in the production of the mating parts. Ninety-five percent of the parts coming off the honing system fall within one 0.0006-mm (0.000025-inch) class size.
As manufacturers continue to raise the bar for part tolerances to these levels, precision multi-spindle bore machining systems are winning a prominent place on the production floor.
Related Content
Should You Bring Tool Regrinding In-House?
In some situations, the potentially high investment in an in-house tool grinding process can be justified with a relatively fast ROI. (Includes video.)
Read MoreHolding Aerospace Tolerances 24/7 in Central Wisconsin
Exceedingly challenging machining applications have a way of becoming achievable with the right team and equipment. Pointe Precision offers a case in point with its new automated fuel metering valve grinding and measurement cells.
Read MoreStuder Universal Cylindrical Grinding Machine Streamlines Performance
Studer’s FavoritCNC universal cylindrical grinding machine has been further developed to feature modern grinding technology with high-precision, simple operation at a cost-effective price point.
Read MorePrecision Machining Technology Review: February 2025
Production Machining’s February 2025 technology showcase includes some of the latest technology from Marubeni Citizren-Cincom, Murata Machinery USA, Mazak, Star CNC, Grob Systems and Schütte.
Read MoreRead Next
Expanding On Honing Options
While available both in horizontal designs and vertical designs, three different machining methods are used for honing operations. The most common method, effective on a range of diameters and materials, uses multistroke machines to hone with one or more abrasive stones attached to a single rotating spindle.
Read MoreFor Plateau Honing, Consider Ball Style
The ball-style hone is a specialized abrasive tool that is instantly recognizable by its unique appearance. For engineers in the automotive, aerospace, manufacturing and machining industries, this application-engineered hone, characterized by the small, abrasive globules that are permanently mounted to flexible filaments, is a flexible, low-cost tool for sophisticated surfacing, deburring and edge blending.
Read MoreFinding the Right Tools for a Turning Shop
Xcelicut is a startup shop that has grown thanks to the right machines, cutting tools, grants and other resources.
Read More
.jpg;width=860)
