Top 2 Questions About Ultrasonic System Setup
Here are two common questions about tank size and baskets and fixtures that Blackstone-Ney Ultrasonics hears from its customers along with the company’s answers that can help build the most productive ultrasonic cleaning unit for a variety of applications.
Ultrasonic cleaning systems are just that — systems that contain several components that work together to achieve the effective cleaning that ultrasonic technology promises. Options for these components should be chosen wisely. Here are two common questions about tank size and baskets and fixtures that Blackstone-Ney Ultrasonics hears from its customers along with the company’s answers that can help build the most productive ultrasonic cleaning unit for a variety of applications.
How do I pick the right tank size and transducer placement?
This is an important question because nobody wants to build a bigger tank than is necessary, but it is also not a good idea to skimp on size. Most ultrasonic tank testing is done without any parts in the tank. However, when you put parts in, everything changes. The liquid should be saturated with cavitation voids to allow for distribution. There must be some free space around the parts being cleaned. For best results, the parts and basket “envelope” should occupy no more than 40% of the tank volume. Some room must be left for cavitation and for ultrasonic reflections to take place or, alternately, a different ultrasonic configuration. Keep in mind that transducers can be placed on the side or even on the top of a tank, in some cases.
Tanks can vary in size from a few cubic inches to as large as several thousand gallons. Something the size of an Olympic swimming pool is well within the reach of current technology.
When cleaning small parts in a single-layer basket, a shallow tank might perform as well or better than a larger one. If an application has a bunch of little parts that are two inches high spread out all over the tank and not in a single layer, the parts are not likely to be cleaned thoroughly. However, when they are arranged in a single layer, there is no need to build a tank 20 inches deep when all that is necessary is one that is 5 inches deep.
Also, there are cases where a tall tank is beneficial. For example, in a plating operation where plating tanks can be 10 or 12 feet deep or more, but they are only 1 or 2 feet wide. In that case, it is impossible to get an even distribution of ultrasonic energy by placing transducers only at the bottom of the tank. Therefore, it is best to disperse transducers along the sides of the tank instead.
How do I design the appropriate baskets and fixtures for my tank?
Remember that the basket or fixture that parts are placed in also becomes part of the cleaning load. Therefore, it should be considered as a cleaning subject as well as the parts in/on it.

Choosing the appropriate baskets and fixtures are an important part of creating just the right ultrasonic cleaning unit for an application.
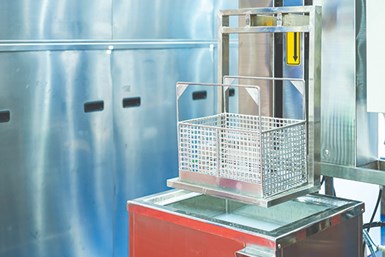
Baskets and fixtures should be lightweight. The lighter the weight, the less load. On the ultrasonic system, there should be an open design or an easy flow of liquid through that basket or fixture and around the parts for more effective cleaning. Plastic, rubber and other soft materials should be avoided because they absorb ultrasonic energy. Chemical-resistant coatings on stainless steel are preferred for the basket and fixture construction.
Also, minimum cleaner carryover should be the goal when considering basket and fixture designs. When moving fixtures from one tank to another, the cleaner can be carried over into the rinse tank. If you make the baskets or fixtures out of tubular stainless steel, for example, they can carry a lot of liquid from one tank to another.
For more information about ultrasonic cleaning unit configuration, watch Blackstone-Ney’s webinar about this topic at gbm.media/ultracleanweb.
Blackstone-NEY Ultrasonics | ctgclean.com
Related Content
3 Common Filtration Questions Answered
Learn about the variety of filters for removing particulates from a cleaning fluid, how to determine cleaning fluid life and more.
Read MoreKyzen Solvents Provide Ease of Cleaning for Medical Parts
The Metalnox line of solvent products are designed to improve reliability and increase the ease of cleaning in vacuum and vapor degreasing processes.
Read MoreMeeting Stringent Cleaning Goals With Modular Ultrasonic System
A knee implant manufacturer implements an advanced cleaning system that meets its tight cleaning requirements, including documenting, validating and tracing the entire cleaning process.
Read MoreIndustrial Cleaning Shop Zeros In on Precision
This parts cleaning company is elevating its efforts to become a technical cleanliness expert, which presents an exciting, yet sometimes arduous, journey. The ongoing education of the team as well as significant investments in equipment and processes attribute to this shop’s success.
Read MoreRead Next
Video: How to Choose the Best Ultrasonic Cleaning Unit
Blackstone-Ney Ultrasonics covers ultrasonic cleaning beyond cavitation and implosion in this webinar.
Read MoreAutomated Cleaning System Improves Productivity
This rotary basket washer drastically reduced the number of operators tending to the cleaning process as well as removed the bottleneck from that station.
Read More2021 PMTS Parts Cleaning Exhibitors Help Determine ‘How Clean is Clean’
Taking advantage of trade shows and conferences geared toward parts cleaning processes, best practices and technologies, such as PMTS, is a great way to become educated about parts cleaning for your company.
Read More


