Examining Non-Contact Inspection for Small Part, High Volume Production
This article looks at current video measurement options for precision measurement.
Manufacturers have several choices for non-contact measurement and inspection of small parts in high volume production operations. QC professionals are faced with measurement requirements that call for increased accuracies and tighter tolerances, especially when inspecting small medical components. As video measurement options continue to advance to meet these challenges, a careful examination of non-contact systems will be helpful in selecting the best solution.
Optical Comparators
The optical comparator is a machine that inspectors rely on because of its ease of use and track record. Comparators are used for a range of dimensional inspection applications. When working with a larger volume of parts, inspectors will find comparators useful for checking every “nth” part for radius, angles, location of specific features and so on to ensure production accuracy. In addition, comparators are especially useful for inspecting features on tooling.
Featured Content
This tried and true inspection solution is well-known for its significant capabilities and durability as an industry “workhorse.” It is especially useful for shop environments because of its ability to withstand contaminants including oil, water, dirt, dust and so on. Further, optical comparators are economical and, if serviced well, can perform for many years. It is not unusual to see the same comparator on the shop floor for 30 years or more.
Comparators provide a combination of excellent image quality coupled with a range of features, which include superb optics, readout devices, software interfaces, geometric measuring capabilities and screens that range in size from 12 inches all the way to 40 inches. Light path options are offered in horizontal or vertical orientations, as determined by the application.
In recent years, many optical comparators are configured with optical edge detection and advancements in microprocessor capability. The latest comparators are full CNC so the systems can be programmed to measure a part without manual intervention. Today’s comparators do not need to be solely dedicated to one particular process, as programs can be changed accordingly for inspecting different parts.
The use of overlays can add some functionality to optical comparators for a go/no-go result. With overlays, inspectors can check complex geometry on parts, including threads on bone screws. However, overlays have limited advantages, and inspectors should be cautioned to watch for overlay associated problems, such as traceability, storage, calibration and operator subjectivity.
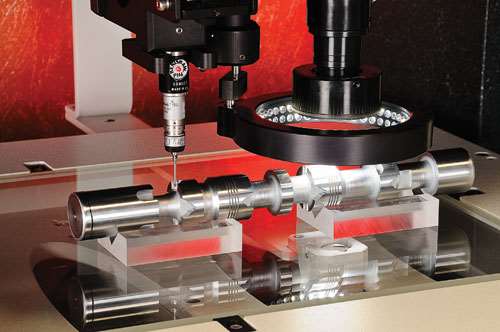
The optical video adapter is an adapter for the comparator that allows traditional optical comparators to be converted into manual video measuring systems by replacing the comparator lens with the new camera-based, video zoom package.
This optical-to-video adapter uses the same quick-change bayonet mount that an operator would use to change from a 10× lens to a 50× lens, with no tools required. In essence, it provides a quick, simple, cost effective entry to newer video measuring technology. This will allow users to obtain excellent surface illumination at substantially higher magnifications than would normally be possible with comparators. Further, if a company has a coordinate measuring machine and requires performance enhancements, it could consider optimizing its current system with an optical video probe.
Vision Systems
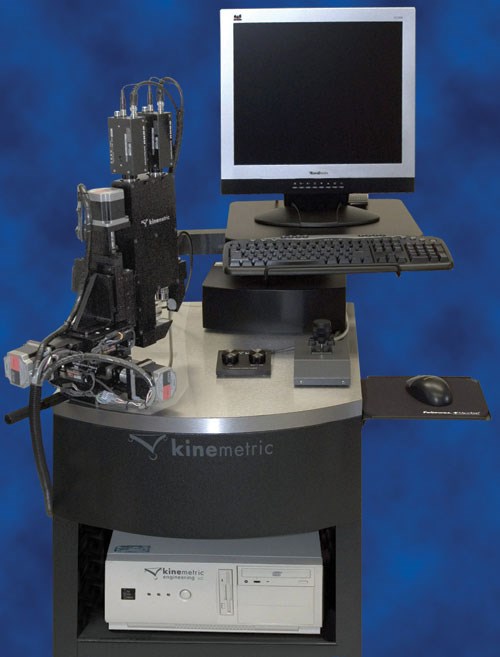
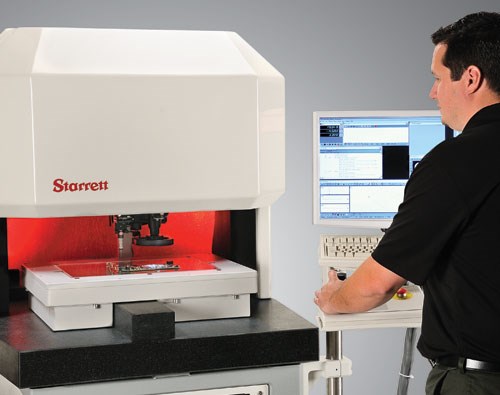
Simple benchtop video measurement systems powered by a PC and independent motion control systems are an excellent choice for many applications. These systems are extremely versatile and are widely used in a variety of production environments. They are fully programmable and offer efficient solutions for walk-up measuring (single feature analysis of a few parts), and they are especially useful for measuring volume lots for production applications. Vision measuring applications can be simple or complex, and a measuring capability of less than 10 percent of allotted tolerance is common. They are fast and reliable and, at the same time, offer small footprints and affordability.
If an application demands brighter surface illumination and higher magnification, a manual vision system should be considered. Compact manual vision systems are available, with live video camera feed and automatic edge detection via digital readouts. This type of system is a video-based measurement system for general purpose quality assurance inspection, manufacturing and R&D non-contact measurement applications. It is a natural upgrade from a comparator, without the complexity of PC-based software.
Vision systems offer excellent surface illumination and the versatility of a zoom lens with magnification ranging from 10× to 240×. Inspectors that know how to use a comparator generally find a manual vision system easy to learn. Features that inspectors find especially useful are image archival with the ability to add text and upload data to a flash memory device. Also, the digital readout adds an excellent advantage by providing video edge detection that automatically detects and targets edge points. This is achieved easily by scanning the image area within a circle around the crosshairs on the display, eliminating operator subjectivity.
For high volume applications that require significant throughput and repeatability, especially when inspecting complicated parts, automated vision systems are invaluable. Automation removes operator subjectivity—essential when working within very tight tolerances.
Multi-Sensor
As components, especially medical, trend toward miniaturization, non-standard shapes and increased precision, the need for multi-sensor measuring systems is on the rise. In many cases, demanding applications can be more reliably measured on single systems that feature vision, touch probe and laser functions. Multi-sensor systems are flexible, enabling companies to do a variety of measurement work with one system. They do, however, require a higher level of training.
For parts with complex, contoured 3D features, laser sensing can be a good choice. This method provides an extensive set of data points that more precisely define a complex shape. A touch probe can work well for large parts with many recesses. However, when a touch probe will not reach critical areas, and/or when fine detail and magnification is essential, video is the best solution.
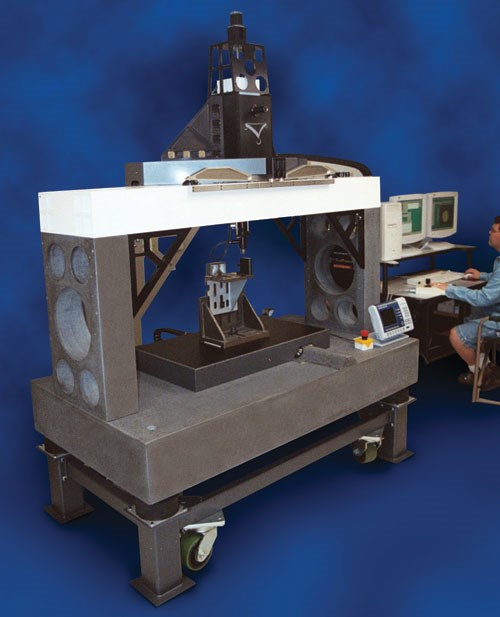
The newest multi-sensor systems include large capacity vision systems featuring enhanced designs for increased performance to provide stability and high accuracy. Designs include a massive granite base, and bridge and air-bearing ways for superior machine stability and precision. Transports are driven by high speed (as much as 30 inches per second), zero maintenance, balanced linear motors, which are close-looped to precision high resolution scales on all three axes. In addition, exceptionally precise mid-size systems offer extra space and enhanced support for multi-sensor attachments.
Custom Metrology
For medical manufacturers especially, there is more pressure to introduce enhanced new products with narrower time-to-market windows. These demands are driving new measuring technology to meet challenges of product engineering and production requirements.
Custom Optical & Vision Metrology systems have become a popular solution for demanding measurement and inspection requirements. Large and small manufacturers have experienced fast returns on the investment in time and capital necessary to find a supplier, determine an effective design and implement an optical measuring system that has been engineered and built for their specific requirements. However, the results can be disappointing if the potential risks are not mitigated by diligent management throughout the project from conception to implementation.
A custom optical inspection machine can be defined as a system that has been designed and built to perform a specific measuring task for which there is not a suitable off the shelf product available. In the medical manufacturing world, custom designed optical metrology projects can range from specially engineered fixturing to extensive engineering projects involving custom hardware and software.
Even relatively small projects can seem overwhelming to the prospective user who thinks that a custom project might be the solution, but has not had experience with such a project. A supplier of “Custom Metrology Systems,” the metrology division of The L.S. Starrett Company has worked with many customers to design and build custom systems. The supplier recommends a phased approach to every project with careful implementation of each phase being the best path to a successful result.
Looking Ahead
Video measurement applications will continue to evolve at a steady pace in the future, so it always behooves users to stay abreast of the latest technological advances. Intuitive systems that require minimal measurement programming, systems with higher resolution field of view measuring capabilities and an increase in automated inspection solutions are on the horizon.
These solutions are a clear outgrowth of the industry’s trend toward inspection of more complex miniature components, the need to remove operator error
or subjectivity and to increase accuracy and throughput. From comparators to vision and multi-sensor systems and even custom solutions using hybrid technologies, there are many ways to apply video/optical measurement and inspection. The key is for a shop to evaluate its options carefully and be sure to access appropriate sources that possess the technology, knowledge and expertise to properly guide the company to the most effective solution.
RELATED CONTENT
-
Profilometer Choices
Learn the difference between skidded and skidless profilometers that can be used to measure the surface roughness of machined parts.
-
Measure 3D Parts Without Losing Time
This high-speed metrology and inspection system is said to process complex geometries faster than traditional inspection methods.
-
The Difference Between Ra and Rz
While it is best to measure using the parameter specified in the print, there are rules of thumb available that can help clear up the confusion and convert Ra to Rz or Rz to Ra.


