Portable, Digital Microscope Records High Resolution Images
Sometimes a picture is worth a thousand words. And sometimes having the ability to take and send a high-resolution digital photograph from the shop floor can be worth thousands of dollars in time savings.
Sometimes a picture is worth a thousand words. And sometimes having the ability to take and send a high-resolution digital photograph from the shop floor can be worth thousands of dollars in time savings. In many current applications, such as micro machining, the human eye is insufficient to accurately determine if the part is right and burr free. The features are simply too small.
On the other hand, large parts can be difficult to move from the shop floor to a stationary inspection area. Having a portable, multifunction device where it’s needed when it’s needed might be a good idea.
Featured Content
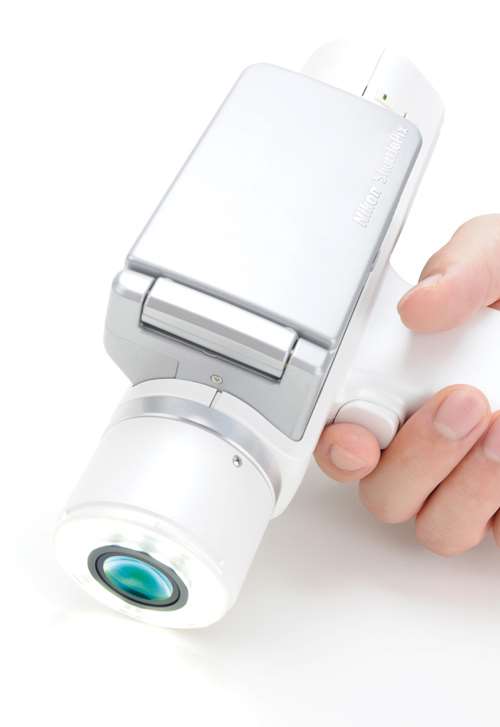
In an effort to help shops examine large and small parts on the shop floor, Nikon Metrology has developed its new ShuttlePix P-400R digital microscope. It is made for inspection, observation, simple measurement and recording of high-resolution images.
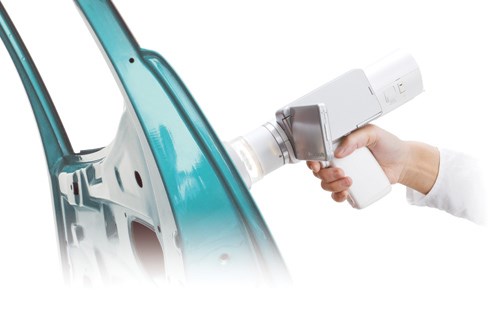
For on-site analysis of samples, it serves as a handheld microscope that shoots high-resolution images as quickly and easily as taking pictures with a digital camera. For stationary use, the microscope interfaces seamlessly with a motorized stand. With the equipped 17-inch touchscreen monitor, the user can easily control, display, measure or print images. The microscope also connects to a standard PC or laptop running dedicated 3D image reconstruction software. The stand is equipped with a motorized Z axis, which does not require a PC for control. Operation of the stand is simple, allowing extended depth of focus (EDF) image capture with the touch of a button.
ShuttlePix offers a 20× zoom with a magnification range of 20× to 400× on a 17-inch monitor. For optimal lighting, the zoom head has built-in, four-section LED ring illumination.
“The versatility of the system means the user can bring the microscope to samples, such as an aircraft frame, turbine casting or pipe work that often cannot be reached with a standard microscope,” says Bob Wasilesky, senior vice president, Nikon Metrology Inc. “The unique ShuttlePix technology supports a range of inspection tasks in automotive, electronics, aerospace and other industries. In combination with its imaging capabilities, it’s a very versatile, extremely useful piece of equipment.”
RELATED CONTENT
-
The Difference Between Ra and Rz
While it is best to measure using the parameter specified in the print, there are rules of thumb available that can help clear up the confusion and convert Ra to Rz or Rz to Ra.
-
Measure 3D Parts Without Losing Time
This high-speed metrology and inspection system is said to process complex geometries faster than traditional inspection methods.
-
Determine Passivation of Stainless
Properly cleaned stainless steel is naturally protected from corrosion by a thin, passive film. But this passive layer can be removed or scratched. A passivation meter measures the surface potential under controlled conditions.


