Wireless Inspection System Improves Machine Shop's Measurement Efficiency
Appears in Print as: 'Giving Bluetooth the Green Light Improves Shop's Inspection Processes'
After implementing a wireless measurement data communication system for its inspection equipment, this machine shop overcame its inefficiencies in its quality department including backlog, accuracy and consistency.
Edited by Lori Beckman
When a machine shop experiences significant growth, keeping the momentum going becomes a priority. To ensure operations keep pace with this growth and continue to support high production standards, a company needs a standardized, streamlined and automated inspection process.
This is true for Hastreiter Industries in Marshfield, Wisconsin. This family-owned machine shop was excited about its growth over a 3-year span — 16% growth in 2019, 29% in 2020 and 19% in 2021. At the same time, its management team desired to be intentional and smart about business practices.
Featured Content
Therefore, when reevaluating its operations, the company recognized that its in-process inspection methods were not as efficient as they could be. In fact, because of these inadequacies, the company experienced backlog in the quality department. After researching many options for improving inspection accuracy and consistency, the shop implemented a wireless measurement data communication system. This system eliminated Hastreiter Industries’ reliance on sometimes inaccurate paper records, increased the amount and quality of inspection data collected and served as a means to automatically record inspection processes. The new equipment also saved the shop time by speeding part measurement.
Gaging the Old Inspection Process
Hastreiter Industries, a 2018 Modern Machine Shop Top Shops benchmarking program winner, was founded in 1988. It offers its customers precision CNC machining, including 3- to 5-axis milling, 2- to 4-axis turning and 5-axis turn-mill capabilities. Its 42,000-square-foot facility on eight acres contains an ISO 8 metrology lab. The high-mix, low-volume shop that offers prototyping services has customers in industries such as aerospace, defense, energy, medical, agriculture and industrial equipment.
Prior to integrating the wireless inspection system called Mitutoyo U-Wave, the shop’s inspection records were handwritten, which led to misinterpretations and errors that negatively impacted data gathering. Also, the shop’s existing mechanical mics and calipers were old and wearing out. Therefore, the company’s apprentices and interns had difficulty accurately recording dimensions, according to Kylan Hastreiter, vice president and a 2021 Production Machining Emerging Leader.
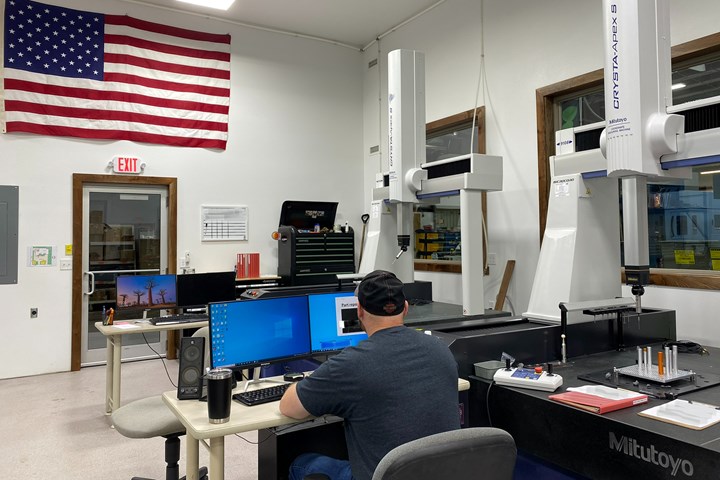
Hastreiter Inudstries’ metrology lab houses two Mitutoyo S9108 Crysta Apex CMMs with Renishaw PH10MQ and a SP25M scanning probes. It is a 1,700-sq.-ft. ISO 8 clean room, ±1°C. Photo Credits: Hastreiter Industries
To accomplish the company’s goal of eliminating manual measurement data collection, management first considered using Microsoft Excel as a solution, which would require plugging a wired system into the statistical process control (SPC) gages. The cables would go back to a box that then communicated to the computer, and a macro would record dimensions.
While this could be a step in the right direction, the company decided against that option. Excel spreadsheets simply recorded the measurements without providing feedback as to whether a dimension meant a part was good or bad. Also, spreadsheets make it difficult to create inspection routines or engage in sampling and were deemed only effective for first-piece inspection and final inspection. And, as a wired solution, the shop found it would be limited to eight gages at a time, each with restricted range.
When realizing Excel’s inflexibility, the company decided to investigate a wireless system. Management first evaluated a traditional, radio-based system. While that worked with most of its applications, the radio system was limited to only 10 channels. Given the shop planned to add Bluetooth wireless gaging to CNC benches at more than 10 locations throughout the shop, 10 channels would be insufficient to overcome interference issues.
As an alternative to a radio-based system, Mitutoyo America Corp. suggested its yet-to-be released U-Wave Bluetooth system. Mitutoyo set up an onsite test, and the shop was impressed from the start.
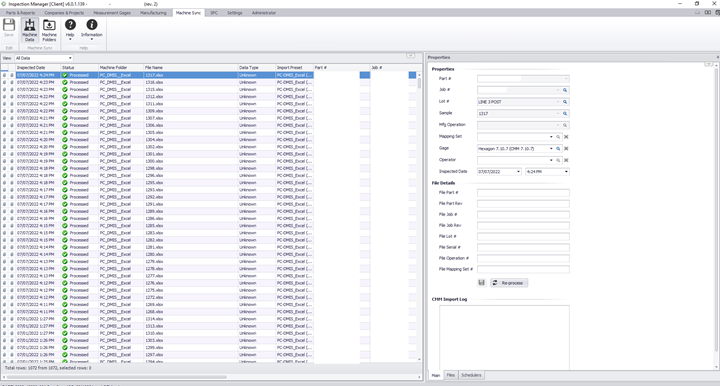
“The wireless Bluetooth packs required no computer plug-ins and worked seamlessly with our HighQA quality management software,” explains Kyle Kann, plant operations manager. “And we were finally able to produce easily accessible digital records for first-piece inspection, in-process inspection and final inspection.”
Hastreiter Industries also considered other brands, but found that not all tools it needed were offered as SPC wireless tools. In addition, some digital mics did not have graduations and verniers. Mitutoyo mics, however, come with those. Hastreiter says if the zero button on a digital mic is hit by mistake, a mic can show the wrong reading. Therefore, machinists often check the vernier and graduations against the digital readout.
The Mitutoyo mic system also had the breadth of SPC wireless tools — mics, point mics, a blade mic, 6- to 24-inch calipers, height gages, disc mics, thread mics, multi-anvil systems and more — needed to accommodate the planned shopwide overhaul.
Measurement That Is On Point
Since April 2021, when the shop decided to invest in the U-Wave Bluetooth as well as two Mitutoyo Crysta-Apex CMMs, it has eliminated paper records and increased the amount and quality of inspection data collected. The new measurement process enables operators to immediately determine if a dimension is out of tolerance, leading to a reduction in scrap and nonconformance, and makes it easier for less experienced operators to record data accurately.
Also, the new inspection equipment enables the department to determine which machinist measured what part by setting up inspection routines in HighQA for each machinist. This production data is not typically available to a quality department, as most low-volume, high-mix shops are not able to access in-process inspection records, according to Hastreiter.
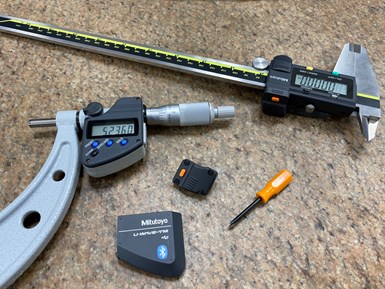
The mic pictured has the Mitutoyo Bluetooth pack off and dismantled, and the caliper has the pack and connector on. The Bluetooth pack (bottom) pairs with the computer. The small black piece (above the Bluetooth pack) is the data transmission button. The transmitter connects the Bluetooth pack to the gage. The small orange screw driver attaches the connector to the transmitter.
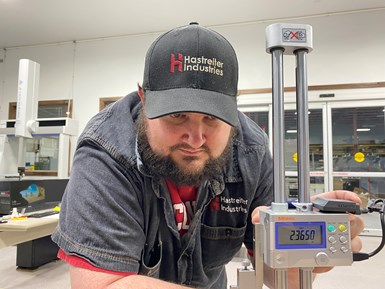
The company has also experienced significant time savings, alleviating backlog in the quality department. It began using digital height gages with Bluetooth low energy (BLE) packs as a replacement for an application that had run on a competitor's vision system. The height gages with BLE packs are saving the shop 1 minute per part, at a weekly quantity of about 1,800 parts. Based on sampling, the new gages have saved 40 hours of inspection time over a 3-month period.
A new piece of equipment without the use of BLE packs would have seen substantial time savings, but would not have been as easy to report. “The BLE packs on the height gage maximize their usefulness with easy reporting,” Hastreiter says. “This high-volume production job could have been measured on the vision system integrated with HighQA, but the height gage was faster, and the BLE pack enables it to be connected.”
Looking ahead, Hastreiter Industries plans to continue adding higher volume offerings for customers, and welcomes the opportunities provided by its new automated inspection data collection.
Not only is the company pleased with its new inspection equipment but Hastreiter says the service and support from Mitutoyo has been top notch. “Calibration cost savings are expected to be five figures over its life span versus another brand we use,” he explains. “Also, we don't have to pay a maintenance fee for support. We saw response times as long as 2 weeks with a competitor, whereas typical call back has been 15 minutes with Mitutoyo without the cost of a maintenance agreement.”
RELATED CONTENT
-
Replace Repetitive Measurement With DIY Robotic Automation
After minimal training, a shop can learn how to use this robotic inspection system configured for a shopfloor application to supersede repetitive, time-consuming, high-mix gaging processes. It can then be redeployed for another application somewhere else in the facility.
-
The Advantages of Automated Shopfloor Gaging
This “parallel kinematic” gage offers the opportunity to automate and improve machining process control for shops endeavoring to move from sample inspection to 100% inspection.
-
Addressing Machining’s Necessary Evil
Many view quality control as such, but integrating new measurement technologies and approaches can ultimately minimize QC’s impact on throughput and a company’s bottom line.


